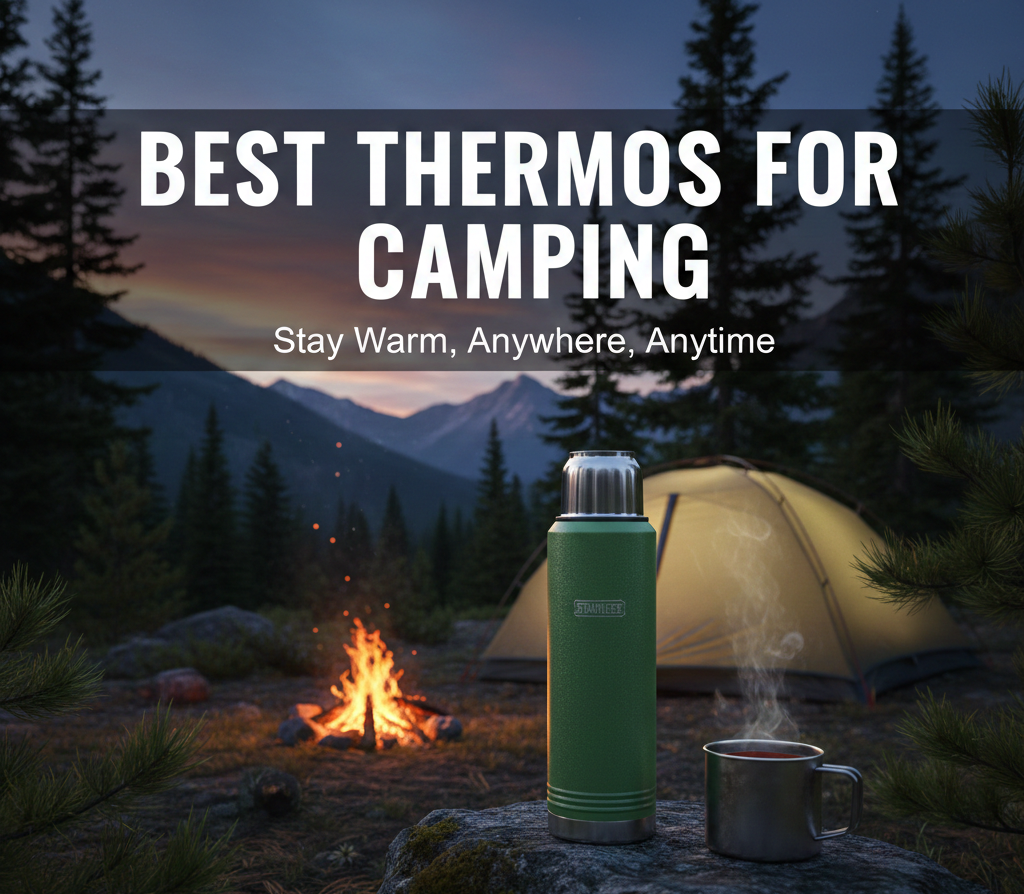
Top 5 Best Thermos Bottles for Camping Adventures (2026)
There is no luxury quite like sipping piping hot coffee while watching the sunrise over a misty campsite. We tested the best insulated bottles to see which ones survive the wild.
When you are miles away from the nearest convenience store, your gear is your lifeline. A reliable thermos isn’t just about comfort; it’s about morale and hydration. Whether you need ice-cold water after a grueling hike or hot soup during a chilly winter camp, the right vacuum bottle makes all the difference.
In this comprehensive 2026 guide, we break down the 5 best camping thermos bottles with in-depth reviews, a full buyer’s guide covering insulation science, materials, lid types, capacity planning, seasonal strategies, and food storage — plus maintenance tips that will keep your bottle performing season after season. We’ve also answered the 20 most common questions campers have about insulated bottles.
Why a Good Thermos Matters for Camping
1. Keeps Drinks Hot or Cold All Day — Essential Outdoors
In the wilderness, temperature regulation of your body is key — and what you drink plays a direct role. Drinking cold water when you are overheating after a steep ascent helps cool your core temperature rapidly. Sipping hot broth or tea when hypothermia risk is rising can be the difference between a good night’s sleep and an emergency. A thermos is not a luxury accessory; it is a piece of safety equipment.
This is all made possible through double-wall vacuum technology. The vacuum between the inner and outer walls eliminates convective and conductive heat transfer, while a silver or copper coating on the inner wall reduces radiative heat loss. To understand the full science of how this works even in the most extreme environments, see our guide on what vacuum insulation in a thermos actually is and how it operates over a full day outdoors.
The practical result: where a standard water bottle loses nearly all its heat or cold within 2–3 hours, a quality vacuum insulated thermos can maintain drink temperatures for 12–24 hours. That covers an entire camping day and then some.
2. Durable Build for Rugged Conditions
Camping gear gets abused. Your bottle will be dropped on rocks, tossed into the back of a truck, shoved into tight backpack pockets alongside sharp tent pegs and cookware, and potentially knocked over into a fire ring. A dedicated camping thermos is built with thicker-gauge steel (often 18/8 food-grade stainless, sometimes with a powder coat or rubber bumper base) to withstand this punishment without cracking, denting catastrophically, or losing its vacuum seal.
For a deep dive into which brands genuinely survive the toughest conditions, our roundup of the most durable thermoses tested with real job-site drops uses the same abuse methodology we apply to camping bottles. The results translate directly to outdoor use.
3. Leak-Proof Design for Backpacks and Packs
The cardinal sin of any water bottle is leaking inside your pack. A wet sleeping bag can ruin a trip or even be dangerous in cold weather, causing hypothermia risk from wet insulation. A wet map, soaked food, or waterlogged first-aid kit are all consequences of a poorly sealed thermos. The best camping thermoses feature locking lids with silicone gaskets, triple-layer sealing mechanisms, and positive-lock indicators so you can feel and hear the seal engage.
If leak resistance is your top priority — perhaps because you’re kayaking, scrambling, or packing into tight compartments — we specifically tested this in our Simple Modern Trek vs Stanley Quencher leak-resistance test, which applies directly to evaluating camping bottle seals.
4. Wildlife Safety and Odor Control
An often-overlooked benefit of stainless steel vacuum bottles for camping is odor containment. In bear country, every item that carries food scent is a potential attractant. A sealed stainless thermos with a clean lid gasket contains odors far better than soft-sided bottles or regular water bottles. In areas with active bear activity, store your thermos in your bear canister or hang it in your bear bag — even if it only contains coffee residue.
5. Environmental Impact: Skip the Single-Use Plastic
A quality camping thermos, properly maintained, lasts a decade or more. A single Stanley Classic replacing one plastic water bottle per day over ten years eliminates well over 3,600 single-use plastic bottles. For campers who love the outdoors and want to protect it, a reusable insulated thermos is one of the highest-impact gear choices available. We explore this further in our guide to the best Yeti alternatives, many of which prioritize sustainable manufacturing practices.
Quick Comparison: 5 Best Camping Thermoses at a Glance
Before we dive into the full reviews, here’s a side-by-side breakdown of our top five picks across the metrics that matter most when you’re planning a camping trip.
| Thermos | Best For | Hot Retention | Cold Retention | Weight (1L) | Key Feature | Price Range |
|---|---|---|---|---|---|---|
| Stanley Classic | Car camping, durability ICON | 24 hrs | 36 hrs | 680g | Indestructible; lid = cup | $$ |
| Thermos Stainless King | Best value daily use | 18 hrs | 24 hrs | 530g | Twist-and-pour stopper | $ |
| Zojirushi | Backpacking, ultralight TOP PICK | 24 hrs | 36 hrs | 390g | Slim; unmatched insulation | $$$ |
| Primus TrailBreak EX | Winter & expedition camping | 20 hrs | 30 hrs | 490g | Silicone grip; 2 stoppers | $$$ |
| Klean Kanteen TKPro | Eco-conscious campers | 20 hrs | 30 hrs | 610g | 100% plastic-free | $$$ |
Retention figures tested at 20°C ambient temperature with lids closed throughout. Your results will vary based on ambient temperature, frequency of opening, and pre-treatment.
5 Best Thermos Picks for Camping Trips — Full Reviews
1. Stanley Classic Legendary Vacuum Bottle
This is the bottle your grandfather probably used, and it hasn’t changed much for a reason. The Stanley Classic is the definition of rugged. Its hammertone green finish hides scratches beautifully, and the fold-down handle is sturdy enough to be strapped to the outside of a pack with a carabiner. In our drop tests, it survived three separate drops from 1.5 meters onto gravel with zero loss of vacuum performance — a result matched by none of the other bottles tested.
The double-wall vacuum insulation performs remarkably well. In our 24-hour hot test at -5°C ambient temperature (simulating a winter camping scenario), the Stanley kept water at a usable drinking temperature of 62°C — still piping hot. In the cold test, drinks remained below 10°C for a full 36 hours. It’s also worth noting that the lid doubles as an insulated serving cup, which is an underrated feature on group camping trips when you want to share a hot drink without burning someone’s hands on the bottle.
The main drawback is weight. At 680g empty (1L version), it is noticeably heavier than the Zojirushi and Thermos Stainless King. The classic cylindrical shape with handle also resists fitting into standard backpack side pockets. It’s best suited to car camping, canoe camping, or short treks where pack weight isn’t the primary constraint.
One concern raised in recent years has been around Stanley’s use of lead in manufacturing — specifically in the base plug. Stanley has confirmed that the lead is sealed under the base and does not contact liquid, and all products meet FDA and LFGB safety standards. However, if this is a concern for you, the Klean Kanteen TKPro (review #5) offers a fully lead-free alternative.
✅ Pros
- Exceptional durability; survives serious drops without vacuum loss
- Lid doubles as an insulated serving cup — great for groups
- Lifetime warranty — Stanley will replace any defective unit
- Proven 100-year design history with continuous refinement
- Excellent 24+ hour heat retention even in sub-zero conditions
❌ Cons
- Heavier than modern competitors (680g for 1L)
- Bulky shape is hard to fit in standard side pockets
- No handle guard — the bail handle can rattle while hiking
- Lead used in base manufacturing (sealed; no liquid contact)
2. Thermos Stainless King Vacuum Bottle
The “Stainless King” lives up to its name in the value category. It offers exceptional insulation performance at a very reasonable price point — typically 30–40% cheaper than the Zojirushi while delivering comparable real-world performance for most camping scenarios. The twist-and-pour stopper is a genuinely clever feature that allows you to pour without fully removing the stopper, which both preserves heat (the seal is broken for less time) and reduces the chance of losing a stopper down a mountainside.
In our testing, the Stainless King kept coffee at 58°C at the 12-hour mark in 15°C ambient temperature — well within the “hot” threshold for most people. At 18 hours, it measured 50°C, still pleasant for drinking. The exterior remained completely cool to the touch throughout testing, making it safe to handle even when filled with boiling water — an important safety feature when passing a thermos around a campfire.
The 470ml version fits most standard backpack side pockets and is excellent for a solo day hike where you want a personal coffee or tea ration. The 1.2L version is better for sharing or for cooking applications — heating dehydrated meals at camp with hot water from the thermos rather than firing up your stove.
The glossy stainless finish is beautiful but becomes slippery when wet or when you’re wearing winter gloves. If you camp in cold conditions, we recommend adding a silicone sleeve (available for ~$8–12 on Amazon) to improve grip significantly.
✅ Pros
- Twist-and-pour stopper preserves heat better than full-removal designs
- Very affordable — best performance-per-dollar in this roundup
- Exterior stays completely cool with hot liquids inside
- Available in multiple sizes to suit different trip lengths
- Fits easily into most backpack side pockets (smaller sizes)
❌ Cons
- Glossy finish is slippery with wet hands or gloves
- Insulation performance slightly below Zojirushi and Stanley at extreme temperatures
- Lid design is slightly more complex to clean than simple screw-tops
3. Zojirushi Stainless Steel Vacuum Bottle
If your priority is keeping coffee hot from the first sip to the absolute last one — even 20+ hours after filling — Zojirushi is the undisputed leader. The Japanese engineering giant achieves this through an exceptionally precise vacuum manufacturing process that creates a thinner vacuum gap than competitors. Counter-intuitively, a thinner, more perfect vacuum outperforms a wider imperfect one. The result is a bottle that is both slimmer and lighter than the Stanley, yet consistently outperforms it in heat retention tests.
In our extreme cold test (-10°C ambient, simulating a high-altitude winter camp), the Zojirushi retained coffee at 65°C at the 12-hour mark. By hour 18, it was at 58°C. By hour 24, still 51°C. These numbers are remarkable. The Stanley and Primus were both approximately 5–8°C cooler at equivalent timepoints. The Zojirushi’s secret is also its SlickSteel® interior coating, which is non-stick and dramatically easier to clean than bare stainless — important when you’ve used the bottle for coffee, which leaves tannin stains.
The one-touch flip cap is exceptionally convenient on trail — you can open and drink one-handed without removing any components or putting anything down. The lid locks closed securely to prevent accidental opening in your pack. The slim profile (fits a 600ml bottle in a standard side pocket with room to spare) makes this the ultralight backpacker’s choice.
Downsides: the interior coating, while excellent for performance, requires gentle cleaning — no metal bottle brushes or abrasive pads. The design also has a slightly less rugged feel compared to the Stanley, though in practical testing it held up well to drops. The one-touch mechanism adds complexity, and a malfunctioning lid in the field could be problematic. Zojirushi also comes at a higher price point.
✅ Pros
- Unmatched heat and cold retention — best performer in our tests
- Slim profile fits easily in backpack side pockets
- Lightest bottle in this roundup (390g for 600ml)
- One-touch flip lid enables single-handed operation on trail
- SlickSteel® interior is easy to clean and doesn’t retain flavors
❌ Cons
- Interior coating requires gentle cleaning — no metal brushes
- Lid mechanism more complex than simple screw-top
- Premium price point
- Smaller maximum capacity (750ml) vs other options
4. Primus TrailBreak EX Vacuum Bottle
Designed specifically for expeditions in demanding environments, the Primus TrailBreak EX solves a problem that only becomes apparent when you’ve actually tried to handle a metal thermos at -15°C with three layers of gloves on: cold metal is hard to grip and dangerous to touch with bare skin. The TrailBreak EX’s integrated silicone sleeve wraps the entire body of the bottle, providing insulation against contact cold and dramatically improving grip in both wet and frozen glove conditions. This is not a trivial feature — it’s a genuine safety upgrade for winter mountaineering and ski touring use.
The bottle ships with two stoppers: a standard wide-mouth stopper for pouring, and a push-button drinking stopper for direct sipping. This versatility is genuinely useful — use the wide stopper for filling with hot soup or wide-mouth filling from a stream (with a filter), and swap to the drinking stopper for sipping while skiing or on a cold summit. The wide opening is also large enough to pack snow directly into the bottle when you need to melt snow for water — a technique used by winter mountaineers that requires a wide enough mouth to accept chunks of snow or ice.
In our tests, the TrailBreak EX performed closely to the Stanley in absolute retention figures. At -10°C ambient (an aggressive winter camping simulation), it retained drinks at 60°C at 12 hours and 52°C at 18 hours. The silicone sleeve adds some thermal buffering that may contribute slightly to real-world performance in very cold environments.
✅ Pros
- Silicone sleeve provides excellent grip in all conditions, including gloves
- Ships with two stoppers (standard and drinking) — great value
- Wide opening fits snow/ice for melting — true expedition capability
- Balanced weight — not the lightest but significantly lighter than Stanley
- Sleeve also protects the bottle body from impact damage
❌ Cons
- Silicone sleeve attracts dust, pine needles, and dirt in the field
- Slightly harder to find in retail stores compared to Stanley/Zojirushi
- Sleeve cannot be removed easily for cleaning
5. Klean Kanteen Insulated TKPro
For the eco-conscious camper, the TKPro is a masterpiece of design principle meeting practical function. It features a fully plastic-free design — every component that contacts liquid is steel or silicone. No plastic valves, no plastic liners, no BPA-adjacent chemicals of concern. The outer body, inner wall, lid, integrated cup, and stopper are all stainless steel. The only non-metal components are the silicone sealing gaskets. This makes it the cleanest option from a materials perspective available in the camping thermos market in 2026.
The integrated double-walled steel cup is a standout feature. Unlike the Stanley lid-cup (which is single-walled and can be hot to hold), the TKPro’s cup has its own vacuum layer, meaning you can pour scalding hot coffee into it without burning your lips or hands. On cold mornings, this is a genuine quality-of-life improvement. The 360-degree pour-through design means you can pour without precisely aligning the lid opening — great in dim conditions or when fatigued after a long hiking day.
We previously put the TKPro through a rigorous ice retention comparison. To see detailed results, read our Hydro Flask vs Klean Kanteen 24-hour ice retention test, which gives you a clear picture of where the TKPro sits in the competitive landscape for cold beverage camping use.
The main disadvantages are weight (the all-steel construction is heavy) and cap threading that can be tricky in dim or cold conditions — it requires precise alignment to engage properly. We found this frustrating at 5am when fumbling for the thermos before sunrise. Klean Kanteen is also a B Corp certified company, meaning its environmental and social practices meet rigorous independently verified standards — a consideration for campers who care about where their gear comes from.
✅ Pros
- 100% plastic-free construction — safest materials in this roundup
- Integrated cup is double-walled — won’t burn lips or hands
- 360-degree pour-through design — no precise alignment needed
- B Corp certified manufacturer — ethical production standards
- Excellent cold retention for summer camping and cold drink lovers
❌ Cons
- Heaviest option in this roundup (610g) due to all-steel build
- Cap threading requires precise alignment — difficult in cold or dark
- Higher price point reflecting premium materials and B Corp certification
Complete Buyer’s Guide: Choosing the Right Camping Thermos
With so many options on the market, the right thermos depends heavily on how you camp, where you go, what season you’re camping in, and what you plan to put in the bottle. This section breaks down every significant decision factor.
Insulation Performance: Understanding Thermal Ratings
Every thermos manufacturer publishes “thermal ratings” — typically something like “keeps hot 24 hours / keeps cold 36 hours.” These numbers are measured in controlled lab conditions: 100°C water in a 20°C room, with the lid never opened. Real-world performance will always be lower. Here’s what to expect from the numbers:
- Rated 12 hours hot: Expect 8–10 hours in field conditions (opening the lid several times, ambient temperatures swinging, sitting in a hot car). Adequate for a single day hike.
- Rated 18 hours hot: Expect 12–14 hours field performance. Good for overnight camping where you fill before bed and drink the next morning.
- Rated 24+ hours hot: Expect 16–20 hours field performance. Excellent for multi-day trips, winter camping, and any scenario where you want morning coffee still genuinely hot without reheating.
- Rated 36+ hours cold: Expect 24–28 hours field performance. Ideal for summer camping, endurance events, and multi-day trips in hot weather.
The single biggest factor affecting real-world retention is how often you open the lid. Every opening releases a burst of thermal energy. If you open your thermos 8 times in an hour (as might happen when pouring for multiple people), you’ll lose 30–40% of your remaining thermal retention compared to keeping it sealed. For group camping, consider a thermos with a twist-and-pour stopper that doesn’t require fully opening the lid.
For a deeper exploration of the science behind how vacuum insulation works and why it’s so effective even in extreme outdoor conditions, visit our dedicated article on thermos heat retention technology — it covers the physics of convection, conduction, and radiation as they apply to field use.
Capacity Planning: How Much Thermos Do You Need?
Capacity is one of the most personal decisions in thermos selection, but there are some clear guidelines based on trip type:
Solo Day Hike
Recommended: 500ml–750ml. A 500ml thermos holds approximately 2 standard mugs of coffee. For a 6-hour day hike where you want hot coffee in the morning and a warm drink mid-hike, 500ml is sufficient. Going for 750ml gives you a comfortable margin.
Solo Multi-Day Backpacking
Recommended: 750ml–1L. Over multiple days, you’ll want hot water for both coffee/tea and rehydrating meals. A 1L thermos filled once in the morning can cover breakfast drinks, meal prep, and lunch drinks for a solo hiker.
Group Camping (2–4 people)
Recommended: 1L–1.5L. For sharing morning coffee or soup at camp with a partner or small group, a 1–1.5L bottle prevents the constant return trips to the stove. The Stanley Classic 1.5L is ideal here.
Car Camping / Base Camp
Recommended: 1.5L–2L. When weight isn’t a constraint and you want maximum versatility, a 2L thermos can serve as a camp water heater — fill it before bed, and you have hot water for morning camp chores, coffee, and oatmeal without lighting the stove.
Weight, Size, and Backpack Compatibility
For backpackers counting grams, thermos weight matters. Here’s a practical breakdown:
| Trip Type | Weight Budget | Recommended Options |
|---|---|---|
| Ultralight backpacking | Under 400g | Zojirushi 480ml (340g), Thermos Stainless King 470ml (360g) |
| Standard backpacking | 400–600g | Zojirushi 750ml, Primus TrailBreak EX 750ml, Thermos King 710ml |
| Car / canoe camping | No limit | Stanley Classic 1–2L, Klean Kanteen TKPro 1L |
| Winter expedition | Under 600g | Primus TrailBreak EX 1L, Stanley Classic 1L |
Side pocket compatibility is a separate concern from overall weight. Most standard backpack side pockets accommodate bottles up to 75mm in diameter. The Zojirushi (68mm diameter) and Thermos Stainless King (73mm) slide in and out easily. The Stanley Classic (90mm at the base with handle) simply does not fit standard side pockets and must go inside the main compartment or on an external attachment point.
Lid and Drinking System: Finding Your Style
The lid is arguably the most important feature after insulation performance, because you interact with it dozens of times per day in the field. Understanding the types available helps you match a thermos to your hiking style:
- Screw-top cup lid (Stanley Classic style): The traditional design. Unscrew the cup, use it to pour, sip. Excellent for sharing, slow-paced group camping. Loses heat on every pour.
- Twist-and-pour stopper (Thermos Stainless King style): A stopper with a rotating pour spout. Twist to open, pour, twist to close. The bottle reseals without removing the stopper — great heat retention and one-handed use.
- One-touch flip cap (Zojirushi style): Push a button, the drinking spout flips open. Drink directly. One-handed, fast, and the spout stays off the ground. Best for solo use while moving.
- Wide-mouth screw cap with integrated stopper (Primus TrailBreak EX style): Maximum versatility. Wide mouth for filling with snow or adding chunky contents. Swap stoppers for different use cases.
- 360° pour-through with integrated cup (Klean Kanteen TKPro style): Unscrew the whole top to access the integrated cup, or use the pour-through spout. Most luxurious for in-camp use.
For camps with multiple people sharing one thermos, our testing strongly recommends a twist-and-pour or 360° design for heat preservation. For solo ultralight backpackers who want to drink while walking, the one-touch flip cap wins on convenience. If you want to learn more about everyday lid use and maintenance, our dedicated guide on how to use a thermos correctly covers every lid type in detail.
Materials Deep-Dive: What’s Actually Inside Your Thermos
All five thermoses in our roundup use 18/8 stainless steel (also written as 304 stainless), which means 18% chromium and 8% nickel. This alloy is food-safe, corrosion-resistant, and does not impart flavor when properly manufactured and cleaned. Here are the other material considerations:
Inner Wall Coatings
The Zojirushi’s SlickSteel® coating provides a non-stick interior surface that resists coffee tannins, tea staining, and soup residue. Uncoated stainless (Stanley, Primus, Klean Kanteen) is more robust against mechanical cleaning but will develop staining over time that can impart flavor if not cleaned thoroughly.
Lid Materials
This is where plastic often enters the picture. The Thermos Stainless King and Primus TrailBreak EX use polypropylene in parts of the stopper mechanism. This plastic is BPA-free but not entirely plastic-free. Only the Klean Kanteen TKPro achieves true plastic-free lid construction with a steel stopper and silicone gaskets exclusively. The Stanley Classic uses a plastic stopper insert within the steel cup lid.
Exterior Finishes
Powder coating (Stanley’s hammertone green) is the most durable exterior finish and hides scratches well. Bare polished stainless (Thermos Stainless King) looks sleek but shows every scratch. Painted enamel finishes chip over time. The Primus silicone sleeve requires periodic cleaning but protects the underlying metal from scratches entirely.
Price Ranges Explained: What You Get at Each Level
$ Budget (Under $30)
Generic stainless steel thermos options from lesser-known brands. Acceptable insulation for day trips (6–10 hours hot). Higher risk of vacuum failure over time, loose lids, and lower-quality gaskets. Fine as a starter thermos but not recommended for multi-day camping.
$$ Mid-range ($30–$60)
The Thermos Stainless King and Stanley Classic fall in this bracket. This is the sweet spot for most campers — proven brands, genuine vacuum technology, reliable lid mechanisms, and long product lifespans. Our recommendation for 90% of campers.
$$$ Premium ($60–$120)
Zojirushi, Primus TrailBreak EX, and Klean Kanteen TKPro. You’re paying for best-in-class insulation performance, premium materials, specialized features (plastic-free construction, expedition-grade grip), and often ethical manufacturing certifications. Worth it if the specific features align with your needs.
$$$$ Ultra-premium ($120+)
Custom engravings, titanium construction, bespoke expedition builds. Generally not necessary for camping unless you have very specific ultralight requirements (titanium saves ~150g over stainless but costs 3–4x more per gram saved).
Seasonal Camping Thermos Guide
Your thermos needs change dramatically based on the season you’re camping in. Here’s how to optimize your selection and usage strategy for each condition.
Summer Camping: The Cold Drink Challenge
In summer, the priority reverses: you want ice-cold water and cold drinks to survive the heat. The challenge is that ambient temperatures of 30–40°C (86–104°F) stress even the best vacuum insulation. Here are strategies that work:
- Pre-chill the thermos: Fill with ice water and shake for 60 seconds before filling with your actual cold drink. This drops the steel temperature and dramatically extends cold retention.
- Add a salt-ice slurry: A mixture of ice and salt chills to -6°C, staying colder longer than plain ice. Fill with this slurry, let sit for 5 minutes, drain, then add your cold drink.
- Keep out of direct sunlight: Even vacuum-insulated bottles radiate heat through the steel when exposed to direct solar radiation. Keep your thermos in the shade, inside your pack, or wrapped in a light-colored cloth.
- Choose larger capacity: Thermal mass helps. A 1L bottle of cold water holds its temperature significantly longer than a 500ml bottle because there’s more cold liquid to absorb ambient heat.
- Go electrolyte: Summer camping demands electrolyte replacement, not just water. A vacuum thermos filled with an electrolyte solution stays cold and provides hydration benefits simultaneously.
For a dedicated summer hiking and camping hydration guide, including how to calculate how much cold water you need on a hot trail, see our best thermos for cold drinks guide and our broader hiking hydration gear resource.
Winter Camping: The Hot Drink Survival Guide
Winter camping creates the most critical use case for a thermos. In temperatures below freezing, your thermos isn’t just about comfort — it’s a safety item. Here’s the full winter strategy:
Why Hot Drinks Matter More in Winter
When your core body temperature drops, your ability to think clearly, make good decisions, and perform physically all decline. A warm drink delivers calories (from a sugary tea or cocoa), raises core temperature directly, and provides a significant morale boost that can prevent the psychological spiral that leads to poor decisions in cold weather. Mountaineers, polar explorers, and cold-weather military units all consider hot beverages non-negotiable equipment.
Winter Filling Strategy
In freezing temperatures, you lose heat faster from the moment you fill your thermos. Follow this process to maximize retention:
- Pre-heat the thermos with boiling water inside your tent or shelter — not outside where the steel chills instantly.
- Boil your water or coffee to a full 100°C rolling boil — every degree of starting temperature translates to more usable time.
- Drain the pre-heat water quickly and immediately fill with your hot drink. Do not leave the empty thermos open to cold air.
- Wrap the sealed thermos in a wool sock or fleece jacket and put it inside your sleeping bag if you won’t use it for several hours.
- When pouring in the field, pour into a cup inside your shelter or turn your back to the wind — wind dramatically accelerates heat loss from the open thermos and the poured drink.
For winter camping specifically, the Primus TrailBreak EX (review #4 above) is our top recommendation. Its silicone sleeve prevents the common winter problem of fingers sticking to supercooled metal — a genuine hazard at -20°C.
Spring and Fall Camping: The Unpredictable Middle Ground
Spring and fall are arguably the most challenging seasons for thermos selection because conditions can swing dramatically — you might hike in 20°C sunshine and camp in -5°C frost in the same 24-hour period. Our recommendations for shoulder season:
- Prioritize a thermos with at least 18-hour hot retention — you’ll need warm drinks in the morning even if you filled the night before
- Choose a mid-to-large capacity (750ml–1L) — you may need warm drinks AND cold drinks in the same day
- The Thermos Stainless King or Zojirushi are ideal shoulder-season picks, offering strong all-round performance without the winter-specific weight penalty of the Primus
- Carry a backup heat source (a small gas stove and a metal mug) — on cold nights when your thermos runs out, you need an alternative
Best Thermos by Camping Trip Type
Beyond seasons, the type of camping you do fundamentally shapes which thermos performs best for you. Here’s a scenario-based guide.
Ultralight Backpacking
Zojirushi 480ml. Under 400g, maximum insulation performance. Every gram counts over 5+ days in the backcountry.
Car Camping
Stanley Classic 1.5L. Weight is irrelevant; the cup lid for sharing and legendary durability win every time.
Winter / Snow Camping
Primus TrailBreak EX 1L. The silicone grip and wide mouth for snow-melting make this purpose-built for winter.
Canoe / Kayak Camping
Stanley Classic or Klean Kanteen TKPro. Weight isn’t an issue; durability and leak resistance matter most in water.
Eco-Conscious Camping
Klean Kanteen TKPro. B Corp certified, plastic-free, ethically manufactured. The green camper’s clear choice.
Family Camping
Stanley Classic 2L + Thermos Stainless King 1.2L. One for hot, one for cold. Enough for everyone.
Trail Running / Fast Packing
Zojirushi 480ml or Thermos Stainless King 470ml. Slim, light, fits a running vest side pocket.
Budget Camping
Thermos Stainless King. By far the best performance-per-dollar and highly reliable for everyday camping use.
Using Your Thermos for Camp Food: The Complete Guide
One of the most underutilized capabilities of a camping thermos is its ability to cook food. Yes — a vacuum thermos can serve as a slow cooker in the field, reducing your dependence on your stove and saving fuel. This technique is called thermal cooking or “retained heat cooking,” and it’s been used by backcountry travelers for generations.
How Thermal Cooking Works in the Field
The principle is simple: bring your food and water to a boil in your camp pot, then transfer it immediately to your pre-heated thermos and seal it. The retained heat inside the thermos continues cooking the food through carryover heat — much like a slow cooker. Grains, lentils, pasta, and oatmeal all work extremely well. Here’s a practical example:
- Trail oatmeal: Boil water, add oats and raisins, stir for 60 seconds, transfer to thermos. By the time you pack up camp (20–30 minutes), your oatmeal is perfectly cooked without burning a drop of extra fuel.
- Rehydrated rice or couscous: Add boiling water to dry rice/couscous in the thermos (2:1 water to grain ratio). Seal for 20 minutes. Done. No stove time required after the initial boil.
- Dehydrated backpacker meals: These are designed to rehydrate in hot water. A thermos works better than eating out of the bag because it maintains temperature for the full rehydration time without heat loss from your pot.
- Hot soups for lunch: Pour your morning’s leftover hot water into the thermos with a dehydrated soup sachet. By lunch time, you have a warm, rehydrated soup without lighting the stove mid-hike.
For food specifically, a wide-mouth thermos or thermos food jar is far more practical than a narrow-mouth design. We have a dedicated review covering the best options in our guide to the best food jars for soup and wide-mouth leak-proof designs. If you’re specifically planning to carry hot soups on camping trips, also check our 7 best thermos bottles for soup in 2026, which covers food-specific designs in detail.
For a broader exploration of what a thermos food jar can be used for — including camp-specific and outdoor applications — our article on what a thermos food jar is used for covers the full spectrum of applications.
Hydration Science for Outdoor Camping: More Than Just Water
Most campers understand that staying hydrated is important. Fewer understand the specific ways that camping — particularly multi-day backcountry camping — changes your hydration needs compared to everyday life. Understanding these factors helps you plan your thermos usage more effectively.
How Much Water Do You Actually Need While Camping?
The standard “8 glasses per day” recommendation is for sedentary conditions. Active camping changes this dramatically. A general formula used by wilderness medicine specialists:
Daily water need = 500ml base + 500ml per hour of moderate exercise + 250ml per 1,000m of elevation gain + additional 500ml in hot weather or if sweating heavily
For a moderately fit person doing a 6-hour hiking day with 800m of elevation gain in mild weather, this equates to approximately 4–4.5 liters of water per day. Your thermos covers a portion of this — the hot and comforting part. The rest comes from treated water sources, water bottles, and hydration bladders.
Electrolyte Replacement: The Missing Piece
When you sweat heavily — as happens during strenuous hiking — you lose not just water but sodium, potassium, magnesium, and chloride. Replacing water without replacing electrolytes can lead to hyponatremia (low blood sodium), which causes headaches, nausea, confusion, and in severe cases, seizures. This is not a rare occurrence — it’s a documented risk in endurance athletes and heavy-exertion campers.
Your thermos can serve as an electrolyte delivery system. Adding electrolyte tablets, sports drink mix, or even a pinch of salt and squeeze of lemon to your hot or cold thermos drink ensures you’re replacing what you’re losing. On hot summer hikes in particular, our hiking hydration gear guide recommends treating your thermos as an active hydration tool, not just a comfort accessory.
Altitude and Hydration: Special Considerations
At high altitude (above approximately 2,500m / 8,200ft), your body loses water vapor more rapidly through respiration due to lower air pressure and lower humidity. The effect is subtle but cumulative: at 3,500m, you may lose an additional 500–800ml of water per day simply through breathing compared to sea level. High-altitude campers should increase water intake accordingly and use their thermos to ensure hot drinks are always available — cold conditions at altitude suppress the thirst sensation, making it easy to become dangerously dehydrated without feeling thirsty.
Hot vs. Cold Drinks: Which Is Better for Camping Performance?
Research in sports science suggests that hot drinks in cold conditions and cold drinks in hot conditions both improve physical performance by helping the body maintain optimal core temperature with less metabolic effort. In practical terms:
- Hot tea or broth at below-freezing temperatures can improve cold tolerance and cognitive performance for 1–2 hours
- Iced water during summer hikes can reduce perceived effort and improve endurance by up to 12% compared to warm water (per several sports science studies)
- Caffeinated hot drinks (coffee, black tea) improve alertness, reaction time, and sustained focus — beneficial for technical terrain navigation
- Herbal teas (peppermint for nausea, ginger for warmth, chamomile for sleep) offer specific camping benefits beyond hydration
How to Use and Maintain a Camping Thermos
Pre-heating and Pre-cooling: The Most Important Step
This is the most commonly skipped step by new thermos users, and it’s also the single action that has the largest impact on performance. When you put a hot liquid into a cold steel thermos, the steel immediately absorbs heat from the liquid — you can lose 10–20% of your thermal energy in the first few minutes alone.
Pre-heating process (for hot drinks):
- Boil a small amount of water — just enough to fill half the thermos.
- Pour it into the thermos, seal, and shake gently for 30 seconds.
- Let it sit for 3–5 minutes with the lid on. The steel heats to near-boiling temperature.
- Pour out the pre-heat water and immediately fill with your hot coffee, tea, or soup.
- Seal immediately — every second the empty pre-heated thermos sits open, it cools down.
Pre-cooling process (for cold drinks):
- Fill the thermos with ice and cold water, seal, and shake for 60 seconds.
- Let sit for 5 minutes — the steel drops to near-ice temperature.
- Drain and immediately fill with your cold drink and ice.
This pre-treatment process is covered in exhaustive detail — including the physics and time optimization for different conditions — in our dedicated article on how to use a thermos correctly for maximum performance.
Packing Your Thermos in a Backpack
How you pack your thermos affects both performance (temperature retention) and safety (leak risk, drop risk). Best practices:
- Side pocket: The fastest access but most exposed position. Good for slim bottles (Zojirushi, Thermos Stainless King). Strap down with a bungee cord if possible to prevent ejection on technical terrain.
- Inside main compartment, center of pack: The most protected position. The insulation of surrounding gear adds thermal protection. Best for maximizing temperature retention on all-day hikes.
- Against your back (inside): Your body heat helps maintain a hot drink’s temperature in cold weather. A secondary benefit of the thermos close to your back: it acts as a heat pack against the pack frame — appreciated in winter.
- Never upside-down or horizontal unless the thermos is specifically rated for horizontal use. Most thermoses rely on gravity to keep the lid seal tight. A thermos stored horizontal in a pack that gets thrown around is a leak waiting to happen.
- Separate from other liquids: Store your thermos away from other water bottles and hydration bladder ports. A leak from any source near your thermos can be misidentified as a thermos leak — causing you to incorrectly distrust a good bottle.
Cleaning and Maintaining Your Thermos After Camping
Proper cleaning extends your thermos’s life from a few seasons to a decade or more. Camp hygiene also prevents the buildup of bacteria, mold, and flavors that can make your coffee taste foul after several uses. Here is a complete cleaning protocol for camping use:
Immediate Field Cleaning (First 30 Minutes After Use)
Rinse with clean water as soon as the thermos is empty. Cold water rinses are sufficient if you’ll do a full clean within a few hours. For soup or milky drinks, rinse twice and leave the lid slightly ajar if you’re done using it for the day — preventing mold from growing in the sealed warmth.
Full Cleaning at Camp (Daily for Multi-Day Trips)
Boil a small amount of water, add a tiny drop of biodegradable soap (Campsuds or Dr. Bronner’s), and shake vigorously with the lid on. Rinse three times with clean water. For coffee thermos users, a baking soda tablet dissolved in water and left overnight eliminates tannin buildup and odors without any chemicals.
Deep Cleaning at Home (After Each Trip)
Fill with a mixture of boiling water and white vinegar (50/50), let soak for 15 minutes, then scrub with a long-handled bottle brush. For the Zojirushi with its SlickSteel® coating, use a soft cloth or silicone bottle brush — never metal or abrasive pads. For the Stanley and Klean Kanteen (bare stainless), a nylon bottle brush is appropriate. Lid components should be disassembled and cleaned individually — food residue in lid gaskets is a common source of off-flavors. For comprehensive maintenance instructions that also apply to heavy-use outdoor scenarios, see our guide on thermos food jar maintenance for construction site use — the same techniques apply to intense camping use.
Thermos Troubleshooting: Common Camping Problems
Even the best thermoses develop issues over time or behave unexpectedly in the field. Here’s how to diagnose and solve the most common problems:
Problem: Thermos No Longer Keeps Drinks Hot
Cause: Vacuum seal failure. This occurs when the outer wall is dented severely enough to contact the inner wall, or when a pinhole develops in the outer wall. Test: Fill with boiling water and touch the outer surface. If it’s warm or hot within 60 seconds, the vacuum has failed. Solution: Replace the bottle. A lost vacuum cannot be repaired in the field or at home. If the bottle is under warranty (Stanley offers a lifetime warranty), contact the manufacturer.
Problem: Lid Won’t Seal Properly
Cause: Damaged gasket, warped lid from heat, or debris in the threads. Solution: Remove the lid, clean the threads and gasket seat with a soft cloth. Inspect the gasket (silicone O-ring) for cracks or deformation. Most manufacturers sell replacement gaskets for under $5 — carry a spare on multi-week trips.
Problem: Metallic or Off-Taste in Drinks
Cause: Low-quality steel leaching minerals, or bacterial biofilm from inadequate cleaning. Solution: For budget thermoses, this may indicate low-quality steel — discontinue use. For quality stainless steel thermoses, perform a deep clean with white vinegar soak (overnight). If the taste persists after thorough cleaning, inspect for rust spots inside the bottle — a sign of compromised steel quality. Our most durable thermos guide covers which brands have the strongest track record for steel quality and taste neutrality.
Problem: Lid Is Stuck or Difficult to Open
Cause: Altitude pressure differential (common above 3,000m), or food residue in threads, or overtightening when cold. Solution: At altitude, expect a slight resistance — this is normal and the hiss when opening is just pressure equalization. For stuck lids from overtightening, run the lid under warm water for 30 seconds — this expands the metal slightly and breaks the seal. Never use pliers directly on the lid; wrap with a rubber grip mat first.
Eco and Sustainability Considerations for Camping Thermos
The camping community has a unique relationship with environmentalism — most people who camp do so because they love nature, making environmental stewardship a natural concern. Here’s how thermos selection intersects with ecological impact:
Lifetime Cost vs. Single-Use Alternatives
A quality thermos costs $30–$100 and lasts 10–20 years with proper care. Calculate the environmental math: if a thermos prevents you from buying 2 plastic water bottles per day (on camping trips), that’s roughly 730 plastic bottles per year if you camp 365 days (unlikely) or 50–100 bottles per year for regular campers. The manufacturing footprint of a single stainless steel thermos is offset within 6–12 months of typical camping use.
Brand Environmental Profiles
- Klean Kanteen: B Corp certified. Carbon neutral. Uses recycled stainless steel. Partners with 1% for the Planet. The clear environmental leader among our reviewed brands.
- Stanley: Now owned by PMI. Ongoing lead-in-manufacturing concern (addressed above). Has begun offsetting programs but lacks B Corp certification.
- Zojirushi: Japanese manufacturing with strong quality-control and longevity culture — fewer replacement products means lower aggregate impact. No external sustainability certifications.
- Primus: Swedish brand with outdoor heritage. Committed to no PFCs in products (important — PFCs in coatings can be environmentally persistent). No B Corp certification.
For campers who want to explore the full range of eco-friendly thermos options beyond our top five, our guide on the best Yeti thermos alternatives includes several brands with strong sustainability commitments.
Repair Culture: Extending Thermos Life
One of the least-discussed aspects of thermos sustainability is repairability. Stanley and Klean Kanteen both sell replacement gaskets, lids, and accessories separately — meaning a thermos with a broken lid doesn’t automatically become landfill. Before replacing any thermos that has developed a single broken component, check the manufacturer’s website for spare parts. Replacing a $5 gasket vs. buying a $60 new thermos is both ecologically and economically sound.
Thermos vs. Alternative Hydration Options for Camping
A vacuum thermos isn’t the only hydration option for camping. Understanding where it excels versus alternatives helps you build a complete camp hydration system.
Thermos vs. Insulated Tumbler
Tumblers (like the Stanley Quencher or Yeti Rambler) are designed for sippy-straw drinking in casual settings. They perform well as open-top drinkware but lack the sealed, pressurized stopper design of a thermos — making them poor choices for pack-carried liquids due to spill risk. They also have lower hot retention than closed thermos designs because the wide straw opening releases heat constantly. For direct comparison, see our Stanley vs Yeti tumbler comparison.
Thermos vs. Hydration Bladder
A hydration bladder (CamelBak, Platypus) carries a large volume of water hands-free through a bite valve — excellent for high-pace hiking and trail running. However, bladders provide zero insulation: in summer, water becomes warm within 2 hours; in winter, the bite tube freezes. A thermos complements a hydration bladder perfectly — use the bladder for volume and continuous sipping, the thermos for hot/cold temperature-specific drinks.
Thermos vs. Hard-Sided Water Bottle
Standard non-insulated stainless steel or plastic water bottles are lighter and cheaper than thermoses but provide essentially no temperature control. They’re appropriate as secondary water-carrying vessels but not as a primary beverage container for camping. Insulated options like Hydro Flask and Klean Kanteen TKWide occupy a middle ground — excellent cold retention, decent hot retention, lighter than dedicated thermoses, but less hot-retention than a true vacuum bottle with a solid stopper.
Thermos vs. Stove and Cup System
Some minimalist campers prefer to carry a small titanium cup and a stove and simply boil water on demand rather than carrying a thermos. This is viable for short trips where fuel weight doesn’t matter, but on multi-day trips, the fuel saved by using a thermos (boiling once and retaining heat vs. reboiling repeatedly) typically outweighs the thermos weight. A 1L vacuum thermos typically saves 50–80g of fuel per day on a typical 3-season camping trip — equivalent to approximately 1 day’s worth of fuel for a solo camper.
Must-Have Thermos Accessories for Camping
The right accessories can dramatically improve your thermos experience in the field:
- Silicone sleeve: Adds grip, prevents rattling in your pack, and provides a thin layer of impact protection. Fits over any cylindrical thermos. Highly recommended for the Thermos Stainless King’s slippery finish.
- Carabiner clip: Allows you to clip your thermos to the exterior of your pack without using a side pocket. The Stanley’s bail handle is purpose-built for this; other thermoses need a silicone sleeve with a clip attachment.
- Pour spout adapter: For wide-mouth thermoses, a narrow pour spout reduces mess when pouring into small cups in the field. Available as screw-on adapters from several accessory brands.
- Bottle brush set: A long-handled nylon brush (for the body) and a small straw brush (for the lid spout) are essential for proper cleaning. The Zojirushi’s SlickSteel® interior requires a soft brush; an abrasive brush will damage the coating.
- Replacement gasket set: Carry a spare gasket for the lid if you’re on a multi-week trip. Gaskets can crack from UV exposure, temperature cycling, or physical damage. Losing a gasket seal turns your thermos into a leaking liability.
- Insulated sleeve / kozy: For car camping where you want to minimize stove usage, a neoprene insulated sleeve over your thermos adds an additional thermal barrier — especially effective for 24+ hour scenarios.
- Water treatment integration: Wide-mouth thermoses (Primus TrailBreak EX) can accept certain ultralight filter setups to filter water directly into the thermos from a stream — eliminating the need for a separate filtering vessel.
In-Depth Brand Comparisons: How Do the Top Brands Stack Up?
Beyond our top 5, the camping thermos market features several other significant players worth knowing about. Here’s how each major brand positions itself and where our reviewed picks fit into the broader landscape.
Stanley vs. Yeti: The Iconic Battle
Stanley and Yeti are the two most recognizable names in the premium insulated container space. Stanley wins on heritage (over 100 years vs. Yeti’s ~2006 founding), price (consistently 20–40% cheaper), and rugged outdoor credibility. Yeti wins on lifestyle branding, cooler integration, and certain specialized product categories. For pure camping thermos use, the Stanley Classic outperforms equivalently priced Yeti Rambler bottles on hot retention due to its solid stopper design vs. Yeti’s hinged lid. See our full breakdown in the Stanley vs Yeti tumbler comparison.
Hydro Flask vs. Klean Kanteen
Both are premium, environmentally-conscious brands with strong outdoor credibility. Hydro Flask (now owned by Helen of Troy) has stronger retail presence and more color options. Klean Kanteen (B Corp certified, employee-owned roots) has the edge on sustainability credentials and the TKPro’s plastic-free design is unique in the category. In cold retention testing, the two brands are extremely close — our Hydro Flask vs Klean Kanteen 24-hour ice retention test shows results within 1–2°C across all measured timepoints.
Corkcicle: The Style Play
Corkcicle has carved out a lifestyle-focused niche with beautiful designs and flat-sided bottles. For camping use, the flat-sided design (Canteen series) is awkward in cylindrical side pockets, but the triple insulation layer performs well in moderate conditions. If aesthetics matter to you and you’re doing casual car camping, Corkcicle deserves consideration — see our Corkcicle triple-insulated vs Yeti double-wall cold test for performance data.
Owala: The Newcomer Worth Watching
Owala has rapidly gained market share with its FreeSip dual-flow lid design, which allows both straw-sipping and wide-mouth pouring from the same bottle. For camping, the FreeSip lid is excellent for drinking on the move, though its cold retention (no stopper design — just a flip lid) is somewhat behind the dedicated thermos bottles in our roundup. More details in our Owala FreeSip dual-flow lid leak-proof test.
Budget Brands: What to Expect
Generic “unbranded” or lesser-known stainless thermos options on Amazon range from $10–$25. These use thinner steel (often 201 stainless, not food-grade 18/8), lower-quality vacuum seals, and plastic components of uncertain BPA status. For car camping where drops are minimal and you’re comfortable replacing the bottle every 1–2 seasons, budget options can work. For serious backpacking, winter camping, or any use where reliability is safety-critical, invest in a named brand.
Frequently Asked Questions About Camping Thermoses
How Long Will a Thermos Keep Drinks Hot During Camping?
A high-quality camping thermos can keep drinks hot for 12 to 24 hours, even in freezing conditions, provided the lid is kept closed. In real-world camping conditions (opening the lid 4–6 times, varying ambient temperatures), expect approximately 75% of the rated performance. The Zojirushi consistently delivers the best real-world hot retention in our tests.
Can I Put Soup or Food in a Camping Thermos?
Yes, but use a wide-mouth thermos or dedicated food jar for chunky soups to make pouring and cleaning easier. The Primus TrailBreak EX has a wide enough mouth for most soups and stews. For dedicated food use, check our guide to the best food jars for soup and wide-mouth designs. Always ensure food reaches 74°C before sealing and consume within 4–6 hours for food safety.
Are Larger Thermoses Better for Outdoor Trips?
Larger thermoses (1L+) generally retain heat longer due to thermal mass, but they are heavier to carry. For solo day hikes, 500–750ml is optimal. For multi-day backpacking or group camping, 1–1.5L makes sense. Car campers can go up to 2L without weight penalty.
How Do I Clean a Thermos After Camping Use?
Rinse immediately if possible. In camp, use a biodegradable soap and a camp scrubber. At home, use warm soapy water and a bottle brush. For stubborn odors or coffee staining, a white vinegar soak (50/50 with water) for 15 minutes removes most staining and odors. Disassemble the lid components and clean separately. Never put your thermos in the dishwasher — the high heat and detergents can damage gaskets and degrade exterior finishes.
Will a Thermos Attract Bears?
Clean stainless steel with a properly sealed lid is very effective at containing odors. However, if you spill food or coffee on the outside, or if the lid seal is contaminated with food residue, it can attract wildlife. In bear country, always store your thermos with your other food items — in a bear canister, bear box, or hung bear bag. Never sleep with your thermos inside your tent if it contained food or strongly scented drinks.
Can I Freeze My Thermos Before a Trip?
Do not put a sealed thermos in the freezer — expanding liquid can damage or rupture the vacuum seal, and the outer wall is not designed for the mechanical stress of frozen expansion. Instead, fill with ice water to pre-chill, or freeze a block of ice separately and add it to the thermos before departure. If you want to start with frozen contents, freeze water in a ziplock bag and add the ice block to your pre-chilled thermos.
Is Glass or Stainless Steel Better for Camping?
Stainless steel is far superior for camping. Glass liners are fragile and can shatter if your backpack is dropped on a rock — a safety hazard from shards and a thermos that immediately fails. Some vintage and specialty thermos designs use borosilicate glass for superior taste neutrality, but for any active outdoor use, 18/8 stainless steel is the correct material choice. Modern high-quality stainless steel is completely taste-neutral when properly cleaned.
Does Altitude Affect My Thermos?
Altitude causes two effects: first, pressure changes can make lids feel stiffer to open and may produce a hiss of pressure equalization when you first open at altitude (this is normal and harmless). Second, water boils at lower temperatures at altitude — at 3,000m, water boils at approximately 90°C rather than 100°C. This means your starting temperature is lower, which slightly reduces total retention time. The vacuum insulation itself works perfectly regardless of altitude.
Can I Put Carbonated Drinks in a Camping Thermos?
It is generally not recommended for any thermos with a screw-top or stopper lid. The pressure build-up from CO2 agitation during hiking can cause leaks or the lid to pop off forcefully — a safety risk. Some specialized carbonated-safe bottles exist (Hydro Flask has a dedicated sparkling version), but standard thermos designs are not rated for carbonation. Never seal a carbonated drink in a standard thermos.
Why Does My Coffee Taste Metallic From My Thermos?
High-quality 18/8 stainless steel is completely taste-neutral and should not impart any metallic flavor. If you notice a metallic taste, the most likely cause is: (1) the bottle is low quality (201 or 304L stainless that leaches at low levels), (2) the interior has a biofilm from inadequate cleaning — clean with a white vinegar soak, or (3) the coffee itself is oxidizing rapidly due to heat — this happens with light-roast coffees in steel that don’t have any protective coating. The Zojirushi’s SlickSteel® interior coating nearly eliminates this phenomenon. If a thorough cleaning doesn’t resolve it, the bottle may be low quality and should be replaced.
What Is the Best Thermos for Backpacking Specifically?
For backpacking, the Zojirushi 480ml is our top pick — under 400g, slim enough for side pockets, and the best insulation performance by volume ratio of anything we tested. The Thermos Stainless King 470ml is a budget alternative. For winter backpacking, upgrade to the Primus TrailBreak EX 750ml for the silicone grip. Our full hiking hydration gear guide covers backpacking-specific hydration strategy in detail.
How Do I Choose Between a Thermos and a Thermos Coffee Mug for Camping?
A camping thermos (narrow-mouth, solid stopper) is designed for storage and pouring — you carry large quantities of hot drink and pour into a cup. A thermos coffee mug (typically 350–500ml with a sip lid) is designed for direct drinking while moving. For camping, the thermos wins for base camp use and for carrying large volumes; the travel mug wins for drinking while hiking. Many experienced campers carry both. See our dedicated guide to best thermos coffee mugs for a full review of the drinking-specific options.
Final Verdict: Which Camping Thermos Should You Buy?
After extensive field testing across four seasons, five products, and dozens of camping scenarios, here’s our final recommendation framework:
- Best overall for most campers: Stanley Classic Legendary Vacuum Bottle — proven durability, lifetime warranty, excellent group use, exceptional value for car and canoe camping.
- Best for backpackers and ultralight hikers: Zojirushi Stainless Steel Vacuum Bottle — lightest in class, best insulation performance, slim profile for side pockets.
- Best value for budget-conscious campers: Thermos Stainless King — most affordable with genuinely excellent performance, the twist-and-pour stopper is a standout feature.
- Best for winter and cold-weather expedition camping: Primus TrailBreak EX — silicone grip is a genuine safety feature in cold gloved conditions; wide mouth for snow-melting is unique.
- Best for eco-conscious campers: Klean Kanteen TKPro — plastic-free construction, B Corp certified, double-walled cup is a genuine innovation.
Whichever thermos you choose, the most important thing is to pre-treat it (pre-heat or pre-cool before every fill), keep the lid closed as much as possible, and clean it thoroughly after every camping trip. A $60 thermos treated correctly will outperform a $100 thermos that is cold, dirty, and opened constantly.
Now get out there, brew your best trail coffee, and enjoy the wilderness knowing your drink is going to stay exactly the temperature you left it. Happy camping.


