How to Tell If a Car Thermostat Is Bad: The Ultimate Diagnostic Guide
Your car’s engine operates in a delicate “Goldilocks Zone”—not too hot, not too cold. The gatekeeper responsible for maintaining this thermal balance is the thermostat. When this small, inexpensive valve fails, it can wreak havoc on your engine, ranging from poor fuel economy to catastrophic overheating.
As experts in automotive thermal dynamics, we have compiled the definitive guide to diagnosing thermostat failure. We will move beyond the basic “check engine light” advice and dive into the physics of cooling systems, referencing our deep dives on what a thermostat actually does and the nuances of symptoms of failure.
This comprehensive guide combines decades of automotive engineering knowledge with practical, hands-on diagnostic techniques. Whether you are a weekend DIY enthusiast, a daily commuter trying to avoid a costly tow, or a fleet manager looking to extend vehicle life, the knowledge contained in these sections will give you the confidence to accurately identify thermostat failure before it becomes catastrophic. We will cover everything from the molecular physics of the wax pellet inside your thermostat to the brand-specific quirks that affect Honda, Toyota, Ford, Chevrolet, BMW, and countless other vehicles on the road today.
⚡ Quick Diagnostics Checklist
If you experience any of these 5 symptoms, your thermostat is likely bad:
- Overheating within 15 minutes: Indicates the thermostat is stuck CLOSED.
- Engine never reaches operating temp: Indicates the thermostat is stuck OPEN.
- Erratic Temperature Gauge: The needle fluctuates wildly or drops suddenly on the highway.
- No Cabin Heat: Blowing cold air even after driving for 20 minutes.
- Coolant Leaks: Specifically around the thermostat housing gasket.
The Anatomy of an Automotive Thermostat: What’s Inside the Valve?
To truly understand why thermostats fail, you must first understand what they are made of. A modern automotive thermostat is a marvel of mechanical simplicity, yet the components inside are precision-engineered to operate within a tolerance of just a few degrees Fahrenheit. Cracking one open reveals a surprisingly elegant assembly designed to last anywhere from 60,000 to 150,000 miles under normal conditions.
The Wax Pellet: The Brain of the Operation
At the heart of every conventional thermostat sits a small copper or brass cup containing a specialized wax compound, often blended with finely ground copper powder to improve thermal conductivity. This wax is not ordinary candle wax—it is a carefully formulated hydrocarbon mixture engineered to undergo a phase change at a precise temperature. When the coolant surrounding the thermostat reaches the rated temperature (typically 195°F for modern vehicles), the wax begins to melt and expand by roughly 10 to 15 percent in volume.
This expansion forces a piston upward against a spring, opening the main valve and allowing hot coolant to flow into the radiator. The beauty of this system is that it is entirely passive—there are no electronics, no sensors, and no computer commands required for basic operation. The wax simply responds to the temperature of the fluid around it, much like the mercury in an old-fashioned thermometer expands and contracts.
The Spring: The Antagonist Force
A stainless steel spring sits beneath the main valve disc, providing the force that keeps the valve closed when the engine is cold. As the wax expands and overcomes the spring’s resistance, the valve opens. When coolant temperature drops, the wax solidifies, the spring’s force overcomes the contracting wax, and the valve snaps shut. Spring fatigue is one of the most common causes of thermostat failure, particularly in vehicles with over 100,000 miles. A weakened spring may allow the valve to flutter open and closed unpredictably, causing the temperature gauge to wander erratically across the dashboard.
The Jiggle Valve: A Tiny But Critical Feature
Look closely at most thermostats and you will spot a small pin or ball bearing in a tiny hole near the edge of the main disc. This is called a “jiggle valve” or “bleed valve,” and its purpose is to allow trapped air to escape from the engine block during the initial coolant fill. Without it, air pockets would form against the closed thermostat, preventing proper coolant circulation and causing overheating even when the thermostat itself is functioning correctly. When installing a new thermostat, the jiggle valve must be oriented at the top (12 o’clock position) so air rises through it naturally.
The Sleeve and Frame
Surrounding the wax pellet is a brass or stainless steel frame that holds everything in alignment. The outer sealing edge of this frame contains a rubber gasket or O-ring that prevents coolant from bypassing the valve when it is closed. Over time, this rubber can harden, crack, or tear, leading to coolant leaks even when the wax pellet itself is still functional. Many thermostat failures attributed to the wax mechanism are actually caused by deteriorated seals around the housing.
The Physics of Cooling: Why Engines Need Thermal Regulation
Internal combustion engines are essentially controlled explosions. During combustion, cylinder temperatures can momentarily reach 4,500°F—hotter than the surface of some stars. The cooling system must absorb this heat efficiently while maintaining the engine block at a steady 195°F to 220°F. This narrow operating window exists for several critical reasons that go far beyond simply preventing meltdown.
The Closed-Loop Fuel Mode Threshold
Modern fuel-injected engines operate in two distinct modes: open loop and closed loop. When the engine is cold, the computer ignores most sensor input and runs a rich, predetermined fuel mixture to ensure smooth cold-start operation. This is “open loop” mode. Once the coolant temperature crosses approximately 160°F, the engine transitions to “closed loop” mode, where the oxygen sensors take over and the computer fine-tunes the fuel mixture for optimal efficiency and emissions.
If your thermostat is stuck open, the engine may never reach the threshold required to enter closed loop. The result is a vehicle that runs perpetually rich, dumping unburned fuel into the catalytic converter, fouling spark plugs, and potentially destroying the catalytic converter—a repair that can easily exceed $1,500. This is why a $20 thermostat failure can cascade into thousands of dollars in damage if ignored.
Thermal Expansion and Engine Tolerances
Every metal component inside your engine is designed to operate at specific tolerances when fully heat-soaked. Pistons, for example, are slightly smaller than their cylinder bores when cold to allow for thermal expansion. If an engine never reaches operating temperature, the pistons remain undersized, leading to increased blow-by, oil contamination, and accelerated wear on the cylinder walls. Conversely, if the engine runs too hot, components expand beyond their design tolerances, causing seizure, warping, and gasket failures.
Lubrication Viscosity
Engine oil viscosity is rated for a specific operating temperature range. A modern 5W-30 oil, for example, achieves its target lubrication properties only when the oil reaches roughly 200°F to 230°F. An engine running cold due to a stuck-open thermostat keeps the oil thick and sluggish, increasing internal friction, reducing fuel economy, and allowing condensation to accumulate inside the crankcase. Over time, this condensation creates a milky sludge that clogs oil passages and dramatically shortens engine life.
Understanding the Failure Modes: Stuck Open vs. Stuck Closed
Before you pop the hood, you need to understand the physics. The thermostat is a wax-actuated valve. When heated, the wax melts and expands, pushing the valve open. When cooled, it contracts and the spring pushes it closed.
Scenario A: Stuck Closed (The Engine Killer)
When the valve refuses to open, hot coolant is trapped inside the engine block and cannot reach the radiator to cool down.
The Symptom: The temperature gauge spikes to the red “H” zone very quickly.
The Risk: Warped cylinder heads and blown head gaskets. This is an immediate emergency.
Scenario B: Stuck Open (The Efficiency Killer)
When the valve refuses to close (often due to a broken spring or debris), coolant flows constantly. The engine never gets hot enough.
The Symptom: The temperature gauge stays near “C” or barely rises. You get poor gas mileage and no heat in the cabin.
The Risk: While less immediate, this causes sludge buildup and prevents the car from entering “closed loop” fuel mode.
Scenario C: Partial Failure (The Hardest to Diagnose)
The most insidious thermostat failure is one that is partially functional. The valve may open, but only halfway. It may open at the correct temperature but close prematurely. It may stick momentarily before snapping open with a thermal shock. These intermittent failures often produce confusing, contradictory symptoms that can frustrate even experienced mechanics. A car may overheat in stop-and-go traffic but run perfectly on the highway, or vice versa. The temperature gauge may behave normally during a 15-minute test drive but spike unexpectedly on a 45-minute commute.
Partial failures are typically caused by debris contamination from old coolant, mineral deposits from hard water mixing, or microscopic cracks in the wax pellet container that allow the wax to slowly leak out. If you suspect a partial failure, the only reliable solution is replacement—attempting to diagnose intermittent thermostat behavior with bench testing alone is often inconclusive.
Step-by-Step Diagnostic Tests
Test 1: The “Hose Touch” Method (No Tools Required)
This is the most effective way to test without removing parts.
- Start the engine from cold.
- Open the hood and locate the Upper Radiator Hose and Lower Radiator Hose.
- Touch the upper hose. It should be cold.
- Wait for the engine to warm up (watch the gauge).
- Healthy Result: Once the engine hits ~195°F, the upper hose should suddenly become hot as the thermostat opens.
- Bad Result (Stuck Open): The hose warms up gradually from the very beginning.
- Bad Result (Stuck Closed): The hose stays cold even when the gauge says the engine is overheating.
Test 2: The Boiling Water Bench Test
If you have already removed the thermostat, you can confirm it is dead before buying a new one.
Watch the video above to see exactly how to suspend the thermostat in boiling water to check for opening.
Test 3: The Infrared Thermometer Sweep
An infrared (IR) thermometer is arguably the most powerful diagnostic tool a home mechanic can own for cooling system work. Unlike the dashboard gauge—which is filtered through the engine control unit and may be smoothed for driver comfort—an IR thermometer gives you raw temperature data at any point on the engine. Start the engine cold and aim the laser at three locations: the thermostat housing, the upper radiator hose at its connection point, and the lower radiator hose. Take readings every 60 seconds for the first 10 minutes of warm-up.
A healthy thermostat will produce a clear thermal “step.” The thermostat housing will rise steadily to around 190°F to 200°F, while the upper radiator hose remains 30 to 50 degrees cooler. Then, suddenly, the upper hose temperature will spike upward as the thermostat opens and hot coolant rushes into the radiator. If you see a smooth, gradual warm-up across both hoses with no clear opening event, your thermostat is stuck open. If the housing climbs past 220°F while the upper hose remains cool, your thermostat is stuck closed.
Test 4: The OBD-II Live Data Method
Plug an OBD-II scanner into the diagnostic port under your dashboard and select “Live Data” or “Data Stream.” Look for the parameter labeled ECT (Engine Coolant Temperature) or similar. Watch this value during a normal warm-up cycle. A healthy engine should reach 195°F within 10 to 15 minutes of driving and remain stable there, with only minor fluctuations of 5 to 10 degrees. If the ECT reading wanders between 140°F and 180°F without ever stabilizing, your thermostat is allowing too much coolant flow. If the ECT climbs rapidly past 220°F, the thermostat is restricting flow.
Test 5: The Pressure Test
A cooling system pressure tester (which you can rent for free at most major auto parts stores) attaches in place of the radiator cap and pumps the system to 15 to 18 PSI. While this test is primarily designed to find leaks, it can also reveal thermostat housing failures. If the pressure drops rapidly and you see coolant weeping from the thermostat housing gasket, you have confirmed the source of an external leak. Pressure testing should always be performed on a cold engine for safety.
Vehicle-Specific Thermostat Symptoms by Make and Model
While the fundamental physics of thermostat failure are universal, different manufacturers have engineered their cooling systems with unique quirks that produce make-specific symptoms. Understanding these nuances can save hours of misdiagnosis.
Honda and Acura Vehicles
Honda thermostats are notorious for being mounted in the lower radiator hose connection rather than at the top of the engine, which is the more common arrangement. This unusual placement means that diagnostic procedures must be adjusted—the upper radiator hose will get hot relatively quickly even with a failing thermostat because hot coolant rises naturally. On Civic, Accord, CR-V, and Pilot models, a failing thermostat often produces a P0128 code accompanied by erratic fan operation. The thermostat housing itself, particularly on V6 engines, can develop cracks that mimic thermostat failure symptoms while actually being a separate issue entirely.
Toyota and Lexus Vehicles
Toyota engines, especially the venerable 2AZ-FE and 2GR-FE families, use thermostats with integrated bypass valves that complicate diagnosis. The Camry, Corolla, RAV4, Highlander, and Tacoma frequently exhibit a unique failure pattern where the thermostat opens correctly during the first heat cycle of the day but becomes increasingly sluggish as it cools and reheats. Owners often report that the car “runs fine in the morning but starts overheating after lunch.” Toyota also recommends specific OEM thermostats with rubber gaskets that are notoriously difficult to install correctly—generic gaskets frequently leak.
Ford Vehicles
Ford’s modular V8 engines (4.6L, 5.4L) used in F-150, Mustang, Crown Victoria, and Expedition models have a thermostat housing made of plastic that becomes brittle with age. The most common failure on these vehicles is not the thermostat itself but the housing cracking and leaking. The 3.5L EcoBoost engine in newer F-150s has a unique dual-thermostat system that requires both units to function correctly—failure of either produces overheating symptoms. Ford trucks often display a “Coolant Over Temperature” warning before the gauge shows a problem, giving drivers a critical early warning.
Chevrolet, GMC, and Cadillac Vehicles
The General Motors LS-series V8 engines found in Silverado, Tahoe, Suburban, Camaro, and Corvette models use a thermostat located in the water pump housing rather than a separate stand-alone housing. This integrated design makes replacement more involved but also more reliable. Common failure symptoms include slow warm-up and a temperature gauge that hovers below the normal operating mark. The 3.6L V6 used in Equinox, Traverse, and Acadia models has a known issue with thermostat housing warping at high mileage, which produces small coolant leaks that can be difficult to spot.
BMW and European Vehicles
BMW vehicles use electronically controlled “map thermostats” on most modern models. These thermostats contain a small heating element that the engine computer can activate to force the thermostat open even when coolant temperatures are below the mechanical opening point. This allows the computer to fine-tune engine temperature based on load, throttle position, and ambient conditions. When these electronic thermostats fail, the symptoms can be confusing—the car may run hot under heavy load but appear normal during cruising. A scan tool capable of reading BMW-specific data is essential for proper diagnosis. Mercedes-Benz, Audi, and Volkswagen vehicles use similar electronic thermostats with comparable failure patterns.
Subaru Vehicles
Subaru’s horizontally opposed “boxer” engines have unique cooling challenges due to their flat layout. The thermostat is typically located on the front of the engine and is relatively easy to access on Outback, Forester, and Impreza models. A failing thermostat on a Subaru often manifests as one cylinder bank running hotter than the other, which can be detected with an IR thermometer pointed at each exhaust manifold.
Choosing the Right Replacement: 160° vs 180° vs 195°
One of the most common mistakes DIY mechanics make is installing the wrong temperature thermostat, thinking it will make the car perform better.
| Temp Rating | Typical Use | Why it matters |
|---|---|---|
| 160°F | Racing / High Performance | Keeps engine very cool for density, but increases emissions. Read 160 vs 180 guide. |
| 180°F | Older Muscle Cars / Towing | A middle ground for engines under heavy load. |
| 195°F | Modern OEM Standard | Required for modern emissions and fuel efficiency. Read 180 vs 195 guide. |
Step-by-Step Thermostat Replacement Procedure
Once you have confirmed that the thermostat is the source of your cooling problems, replacement is a relatively straightforward procedure on most vehicles. The job typically takes between one and three hours depending on engine accessibility, and it is one of the most rewarding DIY repairs because the results are immediately noticeable.
Tools and Materials You Will Need
Before starting, gather all of the following: a new thermostat with the correct temperature rating for your vehicle, a new gasket or O-ring (most thermostats come with one, but verify), the correct type of coolant for your vehicle (usually one to two gallons), a coolant catch pan with at least one-gallon capacity, a metric or SAE socket set appropriate for your vehicle, a torque wrench rated for low-torque applications (5 to 20 ft-lbs), pliers for hose clamps, a clean rag, distilled water for any necessary mixing, and disposable nitrile gloves since coolant is toxic to skin.
Step 1: Allow the Engine to Cool Completely
This is non-negotiable. Coolant in a hot engine is pressurized and can reach temperatures of 240°F or higher. Wait at least four hours, or preferably overnight, before beginning work. Touch the upper radiator hose to verify it is at ambient temperature before proceeding.
Step 2: Drain the Cooling System
Position your catch pan beneath the radiator drain plug, which is usually a plastic petcock at the bottom of the radiator on the driver’s side. Open the radiator cap to allow air to enter the system, then open the petcock. Allow the coolant to drain completely—this typically takes 15 to 20 minutes. Some vehicles also have a block drain plug that should be opened to fully empty the system, though this is rarely necessary for a thermostat replacement.
Step 3: Locate and Access the Thermostat Housing
The thermostat housing is typically a small dome-shaped or cylindrical fixture where the upper radiator hose connects to the engine. On some vehicles, it is at the front of the engine block; on others, it is on the side or rear. Consult your vehicle’s service manual if you cannot locate it visually. You may need to remove an air intake tube, a strut tower brace, or other components to gain access on tightly packaged engines.
Step 4: Remove the Upper Radiator Hose
Loosen the hose clamp that secures the upper radiator hose to the thermostat housing. Carefully twist the hose to break any seal that has formed, then pull it free. A small amount of residual coolant will spill out, which is why your catch pan should remain in position.
Step 5: Unbolt the Housing
The thermostat housing is typically secured by two or three bolts ranging from 8mm to 12mm in size. Loosen all bolts in a crisscross pattern to prevent warping the housing. Once they are loose, remove them completely and gently lift the housing away from the engine. If the housing is stuck due to a hardened gasket, never pry with a metal screwdriver—use a plastic gasket scraper or rubber mallet to break it free without damaging the sealing surfaces.
Step 6: Remove the Old Thermostat
Note the orientation of the old thermostat carefully before removing it. The wax pellet (the cylindrical or domed portion) should always face into the engine, while the spring side faces toward the radiator. Take a photograph if necessary. Remove the old thermostat and the old gasket or O-ring.
Step 7: Clean the Sealing Surfaces
Use a plastic gasket scraper to remove every trace of old gasket material from both the engine and the housing. Even small bits of old gasket can prevent the new seal from making proper contact, leading to leaks. Wipe the surfaces clean with a lint-free rag and a small amount of brake cleaner or isopropyl alcohol.
Step 8: Install the New Thermostat
Install the new thermostat in the same orientation as the old one—wax pellet facing the engine. Critically, ensure that the jiggle valve (the small pin or ball bearing on the disc) is positioned at the highest point, typically the 12 o’clock position. This allows trapped air to escape during the refill process.
Step 9: Install the New Gasket and Reattach the Housing
Place the new gasket or O-ring on the housing. Some installations call for a thin bead of RTV silicone, but most modern thermostats use a rubber O-ring that requires no additional sealant—check your vehicle’s specifications. Reposition the housing and start the bolts by hand to avoid cross-threading. Tighten the bolts in a crisscross pattern to the manufacturer’s specified torque, typically 7 to 10 ft-lbs for aluminum housings. Over-tightening can crack the housing or warp it, causing leaks.
Step 10: Reconnect the Hose and Refill the System
Reattach the upper radiator hose and tighten the clamp. Close the radiator drain petcock. Slowly refill the radiator with the correct coolant mixture, then top off the overflow reservoir to the “Cold Fill” line.
How to Bleed Air from Your Cooling System
Refilling a cooling system is more complex than simply pouring coolant into the radiator. Air pockets trapped in the engine block, heater core, and around the thermostat itself can prevent proper coolant circulation, leading to localized overheating and false thermostat failure symptoms even with a brand-new part installed. The process of removing these air pockets is called “bleeding” or “burping” the cooling system.
Method 1: The Bleeder Valve Method
Many vehicles have one or more dedicated bleeder valves on the engine or radiator. These are small brass or plastic screws located at the highest points of the cooling system. To use them, fill the radiator slowly while opening each bleeder valve. As coolant rises through the system, air will escape from the open valves. Once a steady stream of bubble-free coolant flows from each valve, close it and continue to the next.
Method 2: The Heater-On Method
For vehicles without dedicated bleeders, the heater-on method is the standard procedure. Fill the radiator to the brim with coolant, leave the radiator cap off, and start the engine. Set the heater to maximum hot and the fan to maximum speed. As the engine warms up, the thermostat will open and the water pump will circulate coolant through the entire system, including the heater core. Watch the radiator carefully—as air pockets escape, the coolant level will drop. Continue adding coolant to keep the radiator full until the level stabilizes and the upper radiator hose becomes hot, indicating full circulation.
Method 3: The Vacuum Fill Tool
Professional shops use a vacuum fill tool that connects to the radiator filler neck and pulls a vacuum on the entire cooling system using compressed air. Once vacuum is achieved, fresh coolant is drawn into the system, completely filling all passages without trapping any air. These tools (often branded as “Airlift” or “UView”) cost between $80 and $200 and are well worth the investment for anyone who works on cooling systems regularly.
Coolant Types and Compatibility: What Goes In Matters
While diagnosing thermostat problems, many DIY mechanics overlook the role that coolant chemistry plays in cooling system health. Modern vehicles are extraordinarily picky about which coolant goes into them, and using the wrong type can cause premature thermostat failure, water pump damage, and even engine block corrosion. Coolant has evolved dramatically since the green ethylene glycol formulations of decades past.
IAT (Inorganic Additive Technology)
Traditional green coolant is the original formulation, using inorganic silicates and phosphates as corrosion inhibitors. It is appropriate for vehicles built before approximately 1995, particularly those with cast iron engine blocks and brass or copper radiators. IAT coolant has a service life of approximately 30,000 miles or two years.
OAT (Organic Acid Technology)
OAT coolants, typically dyed orange, red, or pink, use organic acids instead of silicates. Examples include GM Dex-Cool, Toyota Long Life Coolant (red), and most aftermarket “extended life” formulations. These coolants are designed for aluminum engine components and have a service life of 100,000 to 150,000 miles.
HOAT (Hybrid Organic Acid Technology)
HOAT coolants combine elements of both IAT and OAT technologies and are commonly found in Chrysler, Ford, and European vehicles. They are typically yellow or gold and have a service life of approximately 100,000 miles.
G-Series European Coolants
Volkswagen, Audi, BMW, and Mercedes-Benz use proprietary coolant formulations designated G05, G11, G12, G12++, G13, and so on. These coolants are not interchangeable, and using the wrong one can cause silicate dropout, water pump seal failure, and accelerated thermostat degradation. Always consult the owner’s manual or vehicle specifications before topping off a European vehicle’s cooling system.
Why Mixing Coolants Is Dangerous
Combining incompatible coolants causes a chemical reaction that produces gel-like deposits, often described as “mud” or “Jello.” These deposits clog the small passages in the radiator core, the heater core, and around the thermostat valve, causing exactly the kinds of overheating symptoms that mimic thermostat failure. If you suspect coolant contamination, a complete cooling system flush is required before any other diagnosis can be reliable.
Tools You Will Need for Diagnosis & Repair
Don’t guess. Use the right tools to confirm the temperature readings accurately.

Infrared Laser Thermometer
The Safe Way to Test. Point this at your radiator hoses to read the temperature instantly without touching hot surfaces. Essential for the “Hose Test.”
Check Price on Amazon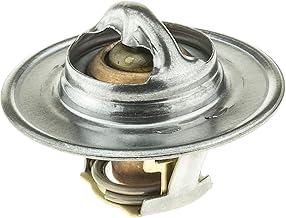
MotoRad Fail-Safe Thermostat
Upgrade Your Part. This patented design automatically locks in the OPEN position if it fails, preventing catastrophic engine overheating.
Check Price on Amazon
BlueDriver OBDII Scanner
Read the Computer. Verify exactly what temperature the ECU is seeing. If your dashboard gauge is broken, this tool tells you the truth.
Check Price on AmazonThermostat Brand Comparison: OEM vs Aftermarket
The thermostat market is flooded with options ranging from $5 economy parts to $80 premium units. Understanding the differences between brands can save you from a repeat repair down the road.
Stant Corporation
Stant is one of the oldest and most respected names in cooling system components, manufacturing thermostats in the United States for over a century. Their SuperStat line uses a unique “balanced sleeve” design that resists pressure fluctuations better than standard valves. Stant thermostats are generally well-regarded for daily drivers and are available in a wide range of temperature ratings. Pricing is moderate, typically $10 to $25 for most applications.
MotoRad
MotoRad is best known for its Fail-Safe thermostat design, which incorporates a secondary spring mechanism that locks the valve in the open position if the wax pellet fails. This is a significant safety upgrade because the most catastrophic failure mode—stuck closed—becomes nearly impossible. MotoRad thermostats are widely used as OEM parts by several European manufacturers and are typically priced between $15 and $35.
Gates
Gates Corporation, primarily known for hoses and belts, also produces high-quality thermostats designed to match OEM specifications closely. Gates thermostats are particularly popular among professional mechanics for their consistent quality and reliable seal performance.
ACDelco
ACDelco is the OEM parts division of General Motors, and their thermostats are designed specifically for GM vehicles. While ACDelco parts can be used in non-GM vehicles when applications match, they are most reliable in their intended platforms. Pricing is moderate to premium.
OEM Dealer Parts
Purchasing a thermostat directly from a dealership ensures perfect fitment and compatibility with your specific vehicle. The downside is cost—dealer parts often cost two to four times more than aftermarket equivalents. For modern vehicles with electronic thermostats, however, OEM parts may be the only reliable option, as aftermarket alternatives often lack the proper electronic communication protocols.
Related Cooling System Components: What Else Could Be Failing?
Many problems that appear to be thermostat failures are actually caused by other cooling system components. Before condemning the thermostat, it is worth understanding the related systems that interact with it.
The Water Pump
The water pump is responsible for circulating coolant through the engine and radiator. When it fails, the symptoms can closely mimic a stuck-closed thermostat—the engine overheats rapidly, especially at idle or in stop-and-go traffic. Distinguishing between water pump and thermostat failure requires inspecting the pump for visible coolant leaks, listening for bearing whine, and checking for play in the pump pulley. Many water pumps have a small “weep hole” that drips coolant when the internal seal has failed.
The Radiator
A clogged or partially blocked radiator restricts coolant flow and prevents proper heat exchange. Symptoms include overheating during highway driving (when airflow demand is highest) and cooler operation at idle. Internal radiator clogging from old coolant deposits can mimic thermostat failure perfectly. A simple test is to point an infrared thermometer at multiple points on the radiator core during normal operation—any cold spots indicate restricted flow in that area.
The Radiator Cap
A surprising number of overheating problems are caused by failing radiator caps. The cap maintains system pressure (typically 13 to 16 PSI), which raises the boiling point of the coolant by approximately three degrees per PSI. A cap that fails to hold pressure allows the coolant to boil prematurely, producing steam pockets that block flow and trigger overheating symptoms identical to a stuck thermostat. Radiator caps should be pressure-tested annually and replaced every two to three years as preventive maintenance.
The Cooling Fan
Modern vehicles use either an electric fan controlled by the engine computer or a mechanical fan driven by a clutch. When the fan fails, overheating occurs at low speeds and idle but resolves at highway speeds when natural airflow takes over. Electric fan failures often produce diagnostic trouble codes, while clutch fan failures require manual inspection—a healthy fan clutch should engage with a noticeable “whoosh” sound when the engine reaches operating temperature.
The Heater Core
The heater core is essentially a small radiator located inside the dashboard that provides cabin heat. A clogged heater core cannot accept coolant flow, which can cause cabin temperature problems but does not typically cause engine overheating. However, a leaking heater core can dump significant amounts of coolant into the cabin or onto the floor, leading to low coolant levels and subsequent overheating symptoms.
The Coolant Temperature Sensor
The engine coolant temperature sensor (ECT) tells the engine computer how hot the coolant is. When this sensor fails, the dashboard gauge may show incorrect readings, leading to false alarms about overheating that are actually sensor problems. A failed ECT will typically trigger codes P0115 through P0119 and may cause poor fuel economy, hard starting, and erratic idle in addition to incorrect temperature readings.
OBD-II Diagnostic Trouble Codes Related to Thermostat Failure
The on-board diagnostic system in your vehicle monitors cooling system performance and stores trouble codes when it detects problems. Understanding these codes can pinpoint the exact nature of a thermostat failure.
P0125: Insufficient Coolant Temperature for Closed Loop Fuel Control
This code indicates that the engine has been running long enough that it should have reached operating temperature, but the ECT sensor reports that it has not. P0125 is almost always caused by a thermostat stuck open, though a failed ECT sensor or low coolant level can produce identical symptoms.
P0126: Insufficient Coolant Temperature for Stable Operation
P0126 is similar to P0125 but is triggered earlier in the warm-up cycle. It indicates that the coolant temperature is fluctuating or rising too slowly during initial warm-up.
P0128: Coolant Thermostat (Coolant Temperature Below Thermostat Regulating Temperature)
This is the most common thermostat-related trouble code. P0128 is triggered when the engine fails to reach the expected coolant temperature within a specified time period after a cold start. The threshold is typically 160°F to 175°F within 10 to 15 minutes of driving. P0128 is the textbook symptom of a thermostat stuck open.
P0217: Engine Coolant Over Temperature Condition
P0217 is the opposite of P0128—it indicates that the coolant temperature has exceeded safe operating limits. This code is most commonly associated with a thermostat stuck closed, though a failed water pump, clogged radiator, or low coolant level can produce the same code.
P0480 through P0485: Cooling Fan Circuit Codes
These codes relate to the cooling fan rather than the thermostat itself, but they often appear alongside thermostat-related codes when the cooling system is struggling.
Climate and Seasonal Considerations
Thermostat problems often reveal themselves seasonally, with different climates producing different symptom patterns.
Cold Weather Operation
In cold climates, a thermostat stuck open becomes immediately obvious because the cabin heater fails to produce warm air. Drivers in northern regions often notice this symptom on the first frost of autumn, when they crank up the heat for the first time in months and discover the cabin is blowing lukewarm air. A stuck-open thermostat in subzero temperatures can also cause severe condensation buildup in the engine, leading to rapid oil contamination.
Hot Weather Operation
In hot climates, a thermostat stuck closed reveals itself within minutes of starting the vehicle, particularly during summer traffic. The combination of high ambient temperatures and restricted coolant flow produces overheating that is impossible to ignore. Owners in desert regions should pay particular attention to thermostat health during the spring as temperatures begin to rise.
Towing and Heavy Load Conditions
Vehicles used for towing or hauling heavy loads place additional stress on the cooling system. A marginal thermostat that performs adequately under light driving may fail dramatically when pulling a trailer up a long grade. If you tow regularly, consider replacing the thermostat preventively every 60,000 miles even if no symptoms have appeared.
Common DIY Mistakes During Thermostat Replacement
Even experienced DIY mechanics frequently make errors during thermostat replacement that lead to repeat failures, leaks, or worse. Avoiding these common pitfalls will dramatically improve your chances of a successful repair.
Mistake 1: Installing the Thermostat Backwards
The wax pellet must face into the engine block, where it is exposed to the hot coolant rising from the cylinder head. If installed backwards, the wax pellet sits in cold coolant and never opens, causing immediate and severe overheating. Always double-check orientation before bolting the housing closed.
Mistake 2: Forgetting the Jiggle Valve Orientation
The jiggle valve must be at the highest point of the thermostat to allow trapped air to escape. Installing it at the bottom or sides creates an air pocket that can cause persistent overheating even with a brand-new thermostat.
Mistake 3: Over-Tightening the Housing Bolts
Aluminum thermostat housings are easily warped or cracked by excessive torque. Always use a torque wrench and follow manufacturer specifications, which are typically much lower than you might expect—often just 7 to 10 ft-lbs.
Mistake 4: Reusing the Old Gasket
Even if the old gasket appears intact, it has compressed and hardened over thousands of heat cycles. A new gasket costs only a few dollars and is the best insurance against future leaks.
Mistake 5: Skipping the Bleed Procedure
Failing to properly bleed air from the cooling system is the single most common cause of “the new thermostat is also bad” complaints. The thermostat is fine—it is sitting in an air pocket and cannot sense the coolant temperature. Always bleed the system thoroughly using one of the methods described above.
Mistake 6: Using the Wrong Coolant
Topping off with the wrong type of coolant can cause silicate dropout and gel formation that ruins not only the new thermostat but the entire cooling system. Always verify the correct coolant specification for your vehicle.
Mistake 7: Not Replacing the Housing When Necessary
On vehicles with plastic thermostat housings (common on Ford, Chrysler, and many European vehicles), the housing itself often degrades alongside the thermostat. If the housing shows any signs of cracking, warping, or discoloration, replace it at the same time as the thermostat. The labor is the same and you will avoid a repeat repair.
Long-Term Consequences of Ignoring a Bad Thermostat
Some drivers, upon discovering their thermostat is stuck open, decide to defer the repair because the car still drives normally and produces no obvious problems beyond a weak heater. This is a costly mistake. The cumulative damage from running an engine cold for thousands of miles can far exceed the cost of a thermostat replacement.
Accelerated Engine Wear
An engine running below operating temperature experiences increased internal friction, accelerated cylinder wall wear, and premature timing chain stretch. Studies by major manufacturers have shown that an engine consistently operating at 160°F instead of 195°F can lose 20 to 30 percent of its expected service life.
Catalytic Converter Damage
A cold-running engine dumps unburned fuel into the exhaust system, where it ignites in the catalytic converter. Over time, this excess heat destroys the catalyst substrate, leading to expensive replacement costs that can exceed $1,500.
Oil Contamination and Sludge Formation
Engine oil that never reaches full operating temperature accumulates moisture and unburned fuel. The result is sludge formation that clogs oil passages, restricts oil flow to critical components, and ultimately leads to catastrophic engine failure.
Reduced Fuel Economy
A stuck-open thermostat typically reduces fuel economy by 10 to 15 percent. Over the course of a year of normal driving, this fuel waste alone can pay for a thermostat replacement many times over.
Failed Emissions Inspections
Many states require periodic emissions testing as part of vehicle registration. A vehicle with a P0128 code or a chronically cold-running engine will almost certainly fail an emissions test, requiring repair before registration can be renewed.
Maintenance Schedule and Preventive Replacement
While thermostats are generally robust components, they do have a finite service life. Establishing a sensible maintenance schedule can prevent unexpected failures and extend the life of your entire cooling system.
Every 30,000 Miles: Visual Inspection
Inspect the thermostat housing for signs of weeping coolant, white mineral deposits, or corrosion. Check the upper and lower radiator hoses for swelling, cracking, or soft spots. Inspect the coolant for proper color and clarity—murky, rusty, or oily-looking coolant indicates contamination.
Every 60,000 Miles: Cooling System Service
At this interval, perform a complete cooling system flush, replace the coolant with the correct specification fluid, and pressure-test the system to verify there are no leaks. If you tow, drive in extreme climates, or operate in stop-and-go traffic regularly, consider preventive thermostat replacement at this interval.
Every 100,000 Miles: Comprehensive Cooling System Refresh
This is the recommended preventive replacement interval for the thermostat, water pump (especially if driven by the timing belt), radiator cap, and major hoses. While the parts may still appear functional, the cumulative stress of 100,000 miles makes failure increasingly likely. Replacing these components proactively is far cheaper than emergency roadside service and engine damage from unexpected failure.
FAQ: Expert Answers
How much does it cost to fix a thermostat?
If you DIY, the part costs between $15 and $40, plus the cost of coolant. If you go to a mechanic, expect to pay between $150 and $300 depending on how hard it is to access the housing.
Q: Can a bad thermostat cause a Check Engine Light?
A: Yes. The most common code is P0128 (Coolant Thermostat – Coolant Temperature Below Thermostat Regulating Temperature). This usually indicates it is stuck open.
Q: Is it safe to drive with a bad thermostat?
A: If it is stuck open, you can drive short distances, but your heater won’t work. If it is stuck closed, do NOT drive. You risk destroying your engine instantly.
Q: How long does a car thermostat typically last?
A: Most thermostats last between 60,000 and 150,000 miles or roughly 10 years, whichever comes first. Vehicles operated in extreme climates, used for towing, or running on hard water-contaminated coolant may experience shorter service life. The wax pellet, springs, and rubber seals all degrade gradually with thermal cycling.
Q: Can I drive home if my temperature gauge is in the red?
A: No. Continuing to drive an overheating engine for even a few miles can warp the cylinder head, blow the head gasket, or crack the engine block. Pull over immediately, turn off the engine, and wait at least 30 minutes before checking coolant levels. If the engine is overheating, call for a tow rather than risk catastrophic damage.
Q: Why does my car overheat only on the highway?
A: Highway overheating typically indicates a clogged radiator, low coolant level, or a partially failed thermostat that cannot keep up with the increased heat load of sustained high-RPM operation. A thermostat that is partially stuck closed may handle low-load city driving but fail under highway conditions.
Q: Why does my car overheat only in traffic?
A: Overheating exclusively at idle and in stop-and-go traffic typically indicates a cooling fan problem rather than a thermostat issue. At highway speeds, natural airflow through the radiator is sufficient even with a non-functional fan. At idle, the fan must do all the work, and a failed fan or fan clutch becomes immediately apparent.
Q: Can a bad thermostat cause my heater to blow cold air?
A: Absolutely. A thermostat stuck open prevents the engine from reaching the temperature needed to produce hot air through the heater core. If your heater blows lukewarm or cold air even after extended driving, suspect the thermostat first, followed by the heater core itself or a stuck heater control valve.
Q: Should I replace the thermostat when replacing the water pump?
A: Yes, almost always. The labor required to access the water pump typically includes draining the cooling system, which is also required for thermostat replacement. Replacing both components simultaneously costs only a few dollars more in parts but saves you from repeating the labor in a year or two when the thermostat eventually fails.
Q: What is a “smart” or “electronic” thermostat?
A: Modern vehicles, particularly European models, often use map-controlled thermostats that contain an electric heating element. The engine computer can activate this heater to force the thermostat open earlier than the wax pellet would naturally, allowing precise temperature control based on driving conditions, throttle position, and ambient temperature. These thermostats fail electronically as well as mechanically and require specialized diagnostic tools.
Q: Can hard water damage my thermostat?
A: Yes. If you have ever topped off your cooling system with tap water instead of distilled water, the dissolved minerals (calcium, magnesium, iron) precipitate out and form deposits on internal cooling system components, including the thermostat. These deposits can prevent the wax pellet from expanding correctly or clog the jiggle valve. Always use distilled water when mixing coolant.
Q: How can I tell the difference between a thermostat problem and a head gasket problem?
A: Both can cause overheating, but head gasket failure produces additional unique symptoms: white smoke from the exhaust, milky-looking oil on the dipstick, bubbles in the radiator, and a sweet smell from the exhaust. A pressure test of the cooling system that shows pressure rapidly building when the engine is running indicates combustion gases entering the cooling system, which is a definitive sign of head gasket failure rather than thermostat failure.
Q: Will a thermostat cause my car to lose power?
A: Indirectly, yes. A thermostat stuck open prevents the engine from reaching the temperature required for closed-loop operation, causing the computer to run a rich, inefficient fuel mixture. This reduces power and fuel economy. A thermostat stuck closed can cause power loss as the engine enters limp-home mode in response to overheating warnings.
Q: Can cold weather cause a thermostat to fail?
A: Cold weather does not directly cause failure, but it can reveal pre-existing weakness. A thermostat with a tired spring may operate adequately in summer but fail to close completely in winter, causing the engine to run cold. Many thermostat replacements happen during the first cold snap of autumn.
Diesel Engine Thermostats: Special Considerations
Diesel engines have unique cooling requirements that differentiate their thermostats from gasoline counterparts. Diesels typically run at slightly lower coolant temperatures (around 180°F to 195°F) but produce significantly more thermal load due to higher compression ratios and longer power strokes. Many modern diesel pickups, including Ford PowerStroke, Chevrolet Duramax, and Cummins-powered Ram trucks, use dual-thermostat systems where two thermostats work in parallel to handle the increased coolant flow demands.
When one thermostat in a dual system fails, the symptoms can be subtle. The engine may seem to operate normally during light driving but exhibit overheating during heavy towing or sustained climbing. Diesel owners towing trailers should pay particular attention to their EGT (exhaust gas temperature) gauges, which often spike before the coolant temperature gauge shows any problem. Replacement of dual thermostats should always be done as a complete pair—installing a new thermostat alongside an aging one creates uneven coolant flow that accelerates failure of the new component.
Diesel thermostats are also more susceptible to contamination from the engine’s own oil leakage paths. Diesel engines produce more soot and combustion byproducts, some of which can find their way into the cooling system through head gasket micro-leaks. This contamination accelerates wax pellet degradation and can clog the jiggle valve. Regular coolant changes every 30,000 to 50,000 miles are particularly important for diesel applications.
Heavy-Duty Truck Thermostats
Class 8 commercial trucks, RVs, and large diesel pickups often use thermostats with much larger physical dimensions and higher flow ratings than passenger car units. These heavy-duty thermostats can cost $50 to $150 each and may have service lives shorter than passenger car equivalents due to the constant heavy-load operation. Fleet operators typically replace thermostats preventively at every major service interval rather than waiting for failure.
Hybrid and Electric Vehicle Cooling Considerations
The rise of hybrid and electric vehicles has introduced entirely new cooling system architectures that traditional thermostat diagnosis may not address. Understanding these systems is becoming increasingly important as more hybrids enter the secondhand market.
Hybrid Vehicle Cooling Systems
Vehicles like the Toyota Prius, Honda Insight, and Ford Fusion Hybrid use a thermostat that operates much like a conventional one, but with an additional twist: the engine cycles on and off frequently, meaning the thermostat experiences far more thermal cycles than in a conventional vehicle. A Prius driven 100,000 miles may have the equivalent of 250,000 miles of thermal cycling on its thermostat. Toyota addresses this by using a thermostat with a coolant heat storage tank that pre-heats coolant before the engine starts, reducing thermal shock.
Many hybrids also use an electric water pump rather than a belt-driven pump, which can continue circulating coolant even when the engine is off. When diagnosing a hybrid cooling problem, both the thermostat and the electric pump should be evaluated. Symptoms that mimic thermostat failure on hybrids may actually be electric pump failures or control module issues.
Electric Vehicle Battery Thermal Management
Pure electric vehicles like Tesla, Chevy Bolt, and Nissan Leaf do not have traditional engine thermostats, but they do have sophisticated battery thermal management systems with their own valves and pumps. Tesla vehicles, for example, use multi-way valves that can direct coolant between the battery, drive units, and cabin heating systems. While these are not “thermostats” in the traditional sense, they perform analogous functions and have their own failure modes that can produce overheating warnings.
Performance and Racing Thermostat Considerations
Drivers building performance or racing engines have specialized cooling needs that differ significantly from daily driving requirements. Understanding when and why to deviate from OEM specifications can mean the difference between a winning track day and a blown engine.
Why Race Engines Run Cooler
High-performance engines benefit from cooler intake air temperatures, which increase oxygen density and allow more aggressive timing advance. Running a 160°F or 170°F thermostat in a track car helps maintain lower combustion chamber temperatures, reducing the risk of detonation under boost or at high RPM. However, this comes with trade-offs: increased emissions, reduced fuel economy, and accelerated wear during cold operation.
The “No Thermostat” Mistake
Some drivers, after experiencing repeated thermostat failures, decide to simply remove the thermostat entirely and run “open loop” cooling. This is almost always a mistake, even on race cars. Without a thermostat, coolant flows so rapidly through the radiator that it does not have time to release heat efficiently, paradoxically causing the engine to run hotter under sustained high load. Additionally, coolant flow becomes uneven through the engine block, creating localized hot spots that can warp cylinder heads. Even race engines benefit from a low-temperature thermostat or a flow restrictor disc rather than complete removal.
Restrictor Plates and Aftermarket Solutions
Some performance applications use a flow restrictor plate—essentially a thermostat housing with a fixed orifice—to maintain proper coolant velocity through the engine. These devices provide some of the benefits of a thermostat without the temperature-dependent valve operation. They are most commonly seen on professional racing applications and are not appropriate for street-driven vehicles.
Coolant Additives: Help or Hurt?
The auto parts store shelves are lined with bottles promising to boost cooling performance, prevent overheating, and extend the life of your cooling system. Most of these products are at best unnecessary and at worst actively harmful to your thermostat and other components.
Stop-Leak Products
Coolant stop-leak additives work by suspending fine particles in the coolant that gravitate to and plug small leaks. While these products can provide a temporary fix for minor leaks, they also tend to accumulate in the smallest passages of the cooling system—including around the thermostat valve and inside the heater core. The result is often an immediate fix to one leak followed by a cascading series of new problems. Stop-leak should be used only as a last resort to limp a vehicle to a repair shop.
Water Wetter and Surfactants
Products like Red Line Water Wetter use surfactants to reduce coolant surface tension, theoretically improving heat transfer. These additives are most beneficial in pure-water cooling systems used in racing applications. For street vehicles using proper coolant mixtures, the benefits are minimal. They are not harmful, but they are also not necessary for proper thermostat function.
The Distilled Water Question
Modern coolants are sold in two formats: pre-mixed (50/50 with water) and full-strength concentrate that must be diluted. When diluting concentrate, always use distilled water rather than tap water. Tap water contains dissolved minerals that precipitate out at high temperatures, forming scale deposits that clog cooling passages and damage thermostat operation. A single five-gallon jug of distilled water from any grocery store costs only a few dollars and can prevent thousands of dollars in cooling system damage.
Reading the Coolant: What Color and Condition Tell You
Visual inspection of your coolant can provide significant diagnostic information about the health of your entire cooling system, including the thermostat. After removing the radiator cap (when the engine is fully cold), examine the fluid carefully.
Color Changes
Fresh coolant should match the manufacturer-specified color: green for traditional IAT, orange or pink for OAT, yellow or gold for HOAT, and various shades for European G-series fluids. If your coolant has turned brown or rusty, the corrosion inhibitors have been depleted and internal corrosion is occurring. If the coolant appears milky or has an oily sheen, oil is contaminating the cooling system—a serious symptom that often indicates head gasket failure or, less commonly, a failed transmission cooler in vehicles where the transmission is cooled through the radiator.
Particles and Debris
Visible particles in the coolant indicate serious problems. Large flakes typically indicate radiator core deterioration or rust scale breaking loose from the engine block. Fine sediment that settles at the bottom of the radiator suggests scale buildup from hard water contamination. Any visible particles should prompt a complete cooling system flush before further diagnosis can be reliable.
Coolant Smell
Healthy coolant has a sweet, slightly chemical odor. A burned smell indicates the coolant has been overheated, which damages corrosion inhibitors and reduces service life. A rotten or sulfurous smell can indicate exhaust gases entering the cooling system through a failed head gasket. Coolant should never smell like raw fuel or oil.
Pressure Testing: The Definitive Diagnostic
For drivers who want absolute certainty about their cooling system’s condition, a comprehensive pressure test provides the most reliable diagnosis available outside of a fully equipped dealership service department.
The Cold Pressure Test
With the engine completely cold, attach a cooling system pressure tester to the radiator filler neck and pump the system to 16 PSI (or whatever pressure your radiator cap is rated for). The pressure should hold steady for at least 15 minutes. If pressure drops, you have a leak somewhere in the system. While pumping, listen carefully for hissing sounds and watch for visible coolant weeping from any joints, hoses, or housings. The thermostat housing gasket is a common leak point that can mimic thermostat failure symptoms.
The Hot Pressure Test
After warming the engine to operating temperature and allowing it to cool slightly (so the system is safe to open), repeat the pressure test. Any leaks that only appear at high temperatures—such as those caused by thermal expansion of cracked components—will reveal themselves now. This is particularly useful for diagnosing intermittent leaks in plastic thermostat housings.
The Combustion Leak Test
If you suspect that a head gasket failure is contaminating your cooling system, a combustion leak test (also called a “block tester”) uses a chemical reagent that changes color in the presence of exhaust gases. The tester attaches to the radiator filler neck and draws air from above the coolant through the reagent. If the fluid changes from blue to yellow, exhaust gases are present in the cooling system, confirming head gasket failure. This test is commonly available at auto parts stores for under $50 and provides definitive diagnosis.
When to Call a Professional Mechanic
While thermostat replacement is a feasible DIY repair on most vehicles, certain situations call for professional assistance.
Buried Thermostats
Some modern engines bury the thermostat behind multiple components that require special tools to remove. The Volkswagen 2.0T engine, for example, places the thermostat in a position that requires partial removal of the timing chain cover. The Chevrolet 3.6L V6 in Traverse and Acadia models has a thermostat housing that requires removal of the intake manifold to access. In these cases, the labor cost difference between DIY and professional service may be minimal compared to the time investment and special tool requirements.
Electronic Thermostats
BMW, Mercedes-Benz, Audi, and other European manufacturers use electronically controlled thermostats that may require coding or programming after replacement. While the physical installation is similar to traditional thermostats, the post-installation calibration often requires manufacturer-specific scan tools. Attempting to replace these thermostats without proper electronic setup can leave the engine in a default failsafe mode that mimics the original failure.
Suspected Head Gasket Damage
If you suspect that overheating from a stuck-closed thermostat may have damaged the head gasket or warped the cylinder head, professional diagnosis is essential before attempting repairs. Driving with a damaged head gasket—even briefly—can lead to complete engine destruction. A combustion leak test, compression test, and visual inspection of the cylinder head should all be performed before assuming the thermostat is the only problem.
Final Thoughts: Prevention Beats Repair
The most effective approach to thermostat problems is preventing them before they occur. Regular coolant changes, periodic pressure testing, visual inspection of hoses and housings, and prompt attention to any unusual temperature gauge behavior can dramatically extend the service life of your cooling system. A small investment in routine maintenance pays enormous dividends compared to the cost of emergency repairs and engine damage from neglected cooling systems.
If you have read this far, you now possess more knowledge about automotive thermostats than the average mechanic. Use this knowledge to advocate for proper repairs, ask informed questions, and make smart decisions about when to DIY and when to seek professional help. Your engine—and your wallet—will thank you.
Explore More Automotive Cooling Guides
Ensure your vehicle runs at peak performance with our expert comparisons:
- Performance Tuning: 160 vs 180 Thermostats
- Daily Driving: 180 vs 195 Thermostats
- Back to Basics: What Does a Thermostat Do?
External Video Resource: How to Test a Thermostat (YouTube)


