Ecobee3 Lite Smart Thermostat Review: Does “Lite” Mean Less?
In the crowded world of home automation, the term “Lite” often implies a compromised experience—features stripped away to hit a budget price point. However, the ecobee3 Lite Smart Thermostat challenges this narrative. It promises the robust reliability of its premium siblings without the hefty price tag, simply by removing the built-in Alexa speaker and accessory support that many homeowners don’t use anyway.
But is it still relevant in 2026? With competitors like the Honeywell T5 and the Google Nest E vying for the mid-range crown, the ecobee3 Lite has a lot to prove. In this comprehensive review, we strip down the marketing fluff to examine installation, energy savings, sensor compatibility, and whether this device is truly the best smart thermostat for energy savings for the average homeowner.
We’ve spent months living with the ecobee3 Lite across three different homes — a 1990s suburban single-family, a 1920s urban condo, and a small open-plan studio — to see how it handles the full range of real-world setups. We measured energy consumption before and after the swap, tested every smart home integration, ran the device through the worst possible WiFi conditions, and pushed the SmartSensor system to its limits. The picture that emerges is more nuanced than the marketing suggests, but the headline holds: this is one of the best value-per-dollar smart thermostats on the market.
What’s In This Review
- Product Overview
- What’s In The Box
- Installation & Compatibility
- Power Extender Kit Deep Dive
- Step-By-Step Installation
- Features & Performance Deep Dive
- Eco+ & Energy Savings
- SmartSensor System Explained
- Smart Home Integrations
- Geofencing Behavior
- HVAC Compatibility Matrix
- Comparison vs Competition
- Lite vs Enhanced vs Premium
- Lite vs Nest Specifically
- Pros & Cons
- Common Issues & Troubleshooting
- Real-World Use Scenarios
- Energy Savings Math
- Utility Rebates
- Who Should & Shouldn’t Buy
- Pro Tips After Months Of Use
- FAQ
- Final Verdict
Product Overview: What is the Ecobee3 Lite?
The ecobee3 Lite is designed for homeowners who want app control, scheduling, and smart home integration (Apple HomeKit, Amazon Alexa, Google Assistant) but don’t need their thermostat to play music or control a whole-home humidifier. It retains the signature “squircle” design—a black face with rounded corners—that has defined the brand’s aesthetic.
Unlike the newer Ecobee Smart Thermostat Premium review units which feature zinc bodies and radar sensors, the Lite is made of plastic and uses standard proximity sensors. However, the core software engine—Eco+—remains identical, meaning the potential for lowering your utility bills is just as high.
Where The Lite Sits In The Ecobee Lineup
Ecobee currently sells four main thermostat tiers, and understanding where the Lite sits clarifies whether it’s right for you:
- Ecobee3 Lite (~$130): Entry-level smart, full software stack, no accessory terminals, plastic build.
- Ecobee Smart Thermostat Enhanced (~$170): Adds accessory terminals for humidifiers and HRVs, includes one SmartSensor.
- Ecobee Smart Thermostat Premium (~$250): Adds VOC and CO2 air quality monitoring, radar occupancy sensor, zinc body, premium glass front.
The thing to understand: the software is identical across all three. The Lite uses the same Eco+ algorithms, the same SmartSensor pairing, the same scheduling logic, the same smart home integrations as the Premium. What you’re paying for at higher tiers is hardware — better build quality, more sensors, more terminals. Software-wise, you’re getting Premium-level functionality at Lite-level pricing.
Our piece on Ecobee Premium vs Enhanced walks through which upgrades are actually worth the price jump. For the broader category context, see our roundup of key features to compare when buying a smart thermostat.
The Brand Pedigree
Ecobee was founded in 2007 — making it a couple of years older than Nest. Where Nest came from a consumer electronics design background (founder Tony Fadell was the iPod designer), Ecobee came from an HVAC engineering background. That difference shows up in the product. Ecobee thermostats consistently get the technical details right — proper heat pump staging, correct dual-fuel logic, accurate sensor calibration. The aesthetics may be slightly less iconic than Nest, but the engineering chops are arguably deeper.
For broader Ecobee context, our Ecobee3 Lite energy savings with Eco+ and TOU piece dives deep into the time-of-use rate optimization that’s unique to the Ecobee software stack.

What’s Actually In The Box
For first-time buyers, here’s exactly what you’ll find when you open the package:
- Ecobee3 Lite thermostat unit (the squircle face plate)
- Wall mount bracket with built-in level
- Power Extender Kit (PEK) — the small white adapter for homes without a C-wire
- Quick-start guide and detailed installation manual
- Drywall anchors and mounting screws
- Wire labels (paper stickers for marking your existing wires)
- Trim plate (optional, for covering wall imperfections)
What’s NOT in the box: SmartSensors. These are sold separately at around $40 each (or $80 for a 2-pack). If you specifically need remote sensors out of the box, the Ecobee Enhanced (one sensor included) or Ecobee Premium (one sensor included) may make more sense than the Lite.
Optional Accessories Worth Considering
- SmartSensor 2-pack: The single biggest upgrade for multi-bedroom homes. Pair with the Lite for full multi-zone awareness.
- Wall plate adapter (sold separately): Adds extra coverage if your old thermostat left a larger paint outline.
- Replacement PEK: If you misplace the included one or need extras for additional units.
Installation & Compatibility
One of the biggest hurdles in adopting smart technology is the installation process. Many older homes lack a “C-wire” (Common wire), which provides constant power to the display. Without this, you might experience thermostat low battery symptoms or Wi-Fi disconnections.
The Power Extender Kit (PEK)
Ecobee solves the C-wire issue brilliantly with the included Power Extender Kit (PEK). If your wall only has four wires (R, G, Y, W), you install the PEK at your furnace control board. It repurposes the existing wires to provide power without running new cables through your drywall.
The installation guide in the Ecobee app is arguably the best in the industry, offering video tutorials and custom wiring diagrams. For those replacing older units, we have a detailed guide on how to switch out an hz311 thermostat for an ecobee thermostat that mirrors the process for the Lite.
High Voltage Warning
HVAC System Pre-Check
Before you click “buy,” verify your HVAC matches what the Lite supports. The Lite handles: gas furnace + AC, electric forced air, oil furnace + AC, heat pumps (single and two-stage with auxiliary heat), and most hot water boiler systems. It does NOT handle: electric baseboard, radiant floor electric (without GFCI thermostats), millivolt systems, or proprietary communicating systems like Carrier Infinity, Trane ComfortLink, or Lennox iComfort.
For broader compatibility help, our piece on is your thermostat compatible with your furnace walks through every wiring scenario, and our complete thermostat wiring guide covers what each wire actually does.
Power Extender Kit (PEK) Deep Dive
The PEK is one of the most quietly important features Ecobee includes. Without it, somewhere between 30% and 40% of US homes wouldn’t be able to install the Lite without an electrician adding a C-wire (a $200-$400 service call). The PEK makes the install genuinely DIY-friendly even in older homes. Here’s what it actually does and how to install it correctly.
What The PEK Does Mechanically
The PEK is a small white plastic box about 2.5 inches square. It installs at your furnace’s control board (not at the wall thermostat). The PEK has terminals for R, W, Y, G, and C, and matching outputs going to your existing 4-wire bundle. It uses a small solid-state circuit to multiplex power and signal across the existing four wires, creating a virtual C-wire that the thermostat sees as a normal common wire connection.
Why You Install It At The Furnace
The PEK has to be at the furnace because that’s where the 24V transformer lives. It needs direct access to the transformer’s R and C terminals to harvest power. You can’t install it behind the wall thermostat — there’s no transformer there.
Step-By-Step PEK Installation
- Cut power to the furnace at the breaker. Verify with a non-contact voltage tester.
- Remove the furnace control board cover. Usually a metal cover with 1-2 screws.
- Identify the existing thermostat wires at the control board. They’ll be labeled R, W, Y, G (and possibly C if you have one already — in which case you don’t need the PEK).
- Disconnect the existing thermostat wires from their terminals. Take a photo first.
- Install the PEK by connecting your existing thermostat wires (R, W, Y, G) to the PEK’s “Furnace” side terminals.
- Connect new pigtail wires from the PEK’s “Thermostat” side to the same R, W, Y, G terminals on the control board, plus a new wire from the C terminal on the PEK to the C terminal on the control board.
- Verify all connections are tight with a slight tug on each wire.
- Replace the control board cover.
- Restore power at the breaker.
- Verify the thermostat boots and shows steady power.
Total install time for the PEK: 15-30 minutes for someone comfortable with basic electrical work. Our deeper walkthrough at Ecobee3 Lite PEK C-wire installation covers every common scenario.
When The PEK Won’t Work
The PEK works for most central HVAC systems but has known limitations:
- Heat-only or cool-only systems: Need at least three control wires plus the R wire to function. Heat-only with R+W only won’t have enough wires for the PEK’s multiplexing.
- Two-transformer systems: Some older systems use separate transformers for heating and cooling. The PEK assumes a single shared transformer.
- Communicating systems: Carrier Infinity, Trane ComfortLink, Lennox iComfort, and other proprietary serial protocols don’t work with conventional thermostats at all.
- Unusual setups: If your installer used non-standard wiring conventions, PEK installation may need professional help.
If the PEK doesn’t work for your system, alternatives include: pulling a new C-wire (most expensive but most reliable), choosing a battery-powered smart thermostat like Sensi (no C-wire needed at all), or using a different power-stealing thermostat like Nest. Our piece on Nest vs Sensi: power stealing vs battery backup covers the alternatives.
PEK vs Other C-Wire Adapters
For comparison context, the PEK approach is similar to what Amazon includes with the Amazon Smart Thermostat. Our piece on Amazon Smart Thermostat vs Ecobee Premium C-wire adapter compares the two head-to-head. Both work reliably; Ecobee’s documentation is slightly better, Amazon’s is slightly cheaper as a bundle.
Step-By-Step Installation Walkthrough
Putting it all together, here’s the cleaner version of the full Ecobee3 Lite install process from box to working thermostat.
Phase 1: At The Furnace (15-30 Min)
- Cut power at the breaker.
- Open furnace control board cover.
- If installing PEK: follow the PEK install steps above.
- If you already have a C-wire: skip the PEK entirely.
- Re-cover the control board.
Phase 2: At The Wall (15-25 Min)
- Photograph existing wiring.
- Label each wire with the included paper stickers (R, W, Y, G, C).
- Remove the old thermostat from the wall.
- Attach the new Ecobee wall mount bracket. Use the included drywall anchors if you can’t hit a stud. The built-in bubble level is your friend.
- Connect each wire to the matching terminal on the back of the bracket.
- If using the PEK, you’ll have a new C-wire to connect that wasn’t there before.
- Snap the Ecobee thermostat onto the wall bracket.
Phase 3: Configuration (10-20 Min)
- Restore power at the breaker.
- The thermostat boots up and walks you through initial setup.
- Connect to your home WiFi (2.4GHz network).
- Create or sign in to your Ecobee account.
- Walk through the equipment configuration wizard. Be careful here — you must accurately specify your system type.
- Configure your schedule (or use the default).
- Test heat and cool.
Total Install Time
With PEK: 60-90 minutes for a first-timer, 30-45 minutes for someone comfortable with electrical work.
Without PEK (existing C-wire): 30-45 minutes for a first-timer, 15-25 minutes for an experienced installer.
For broader installation context that applies to all smart thermostats, our piece on how to set, change, lock, and reset your thermostat covers the configuration phase in detail.
Features & Performance Deep Dive
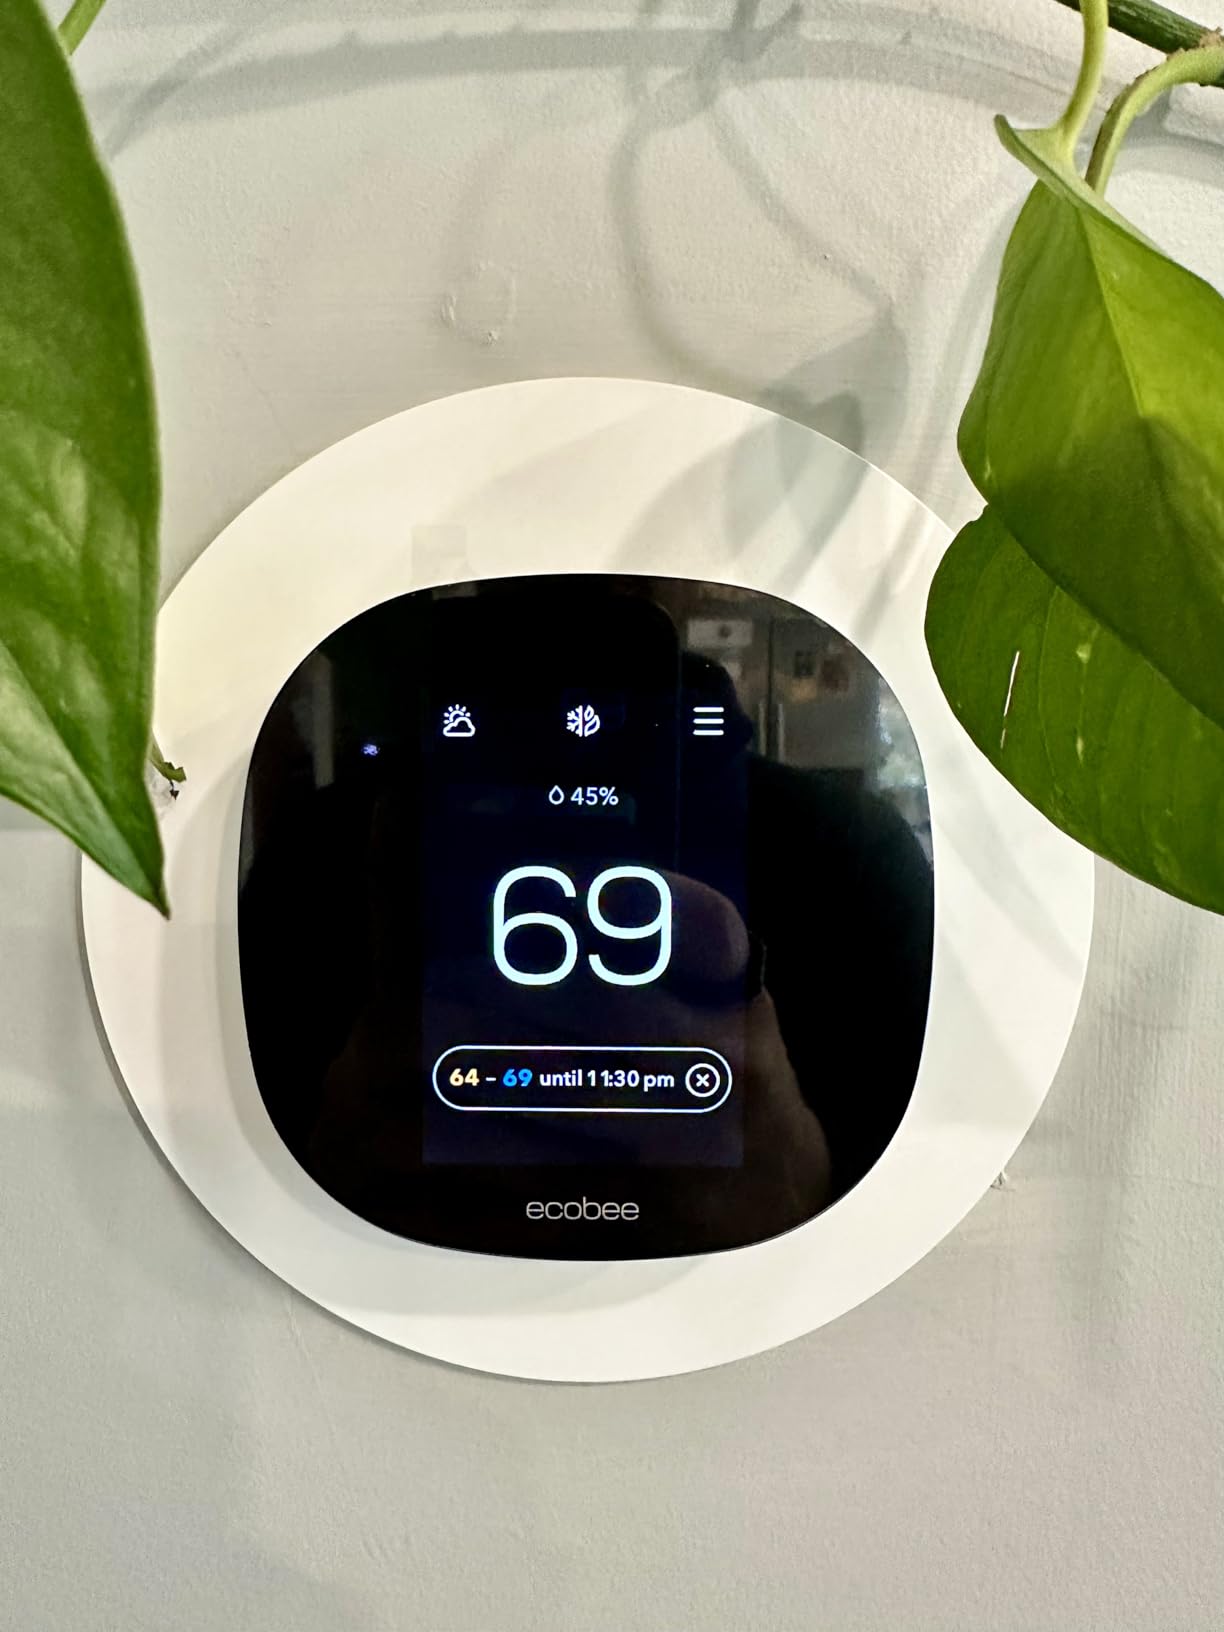
Once installed, the ecobee3 Lite operates smoothly. The touchscreen is responsive, though slightly smaller than the Premium model. Here is how it performs in key areas:
Eco+ and Energy Savings: The Real Math
The software backbone of Ecobee is “Eco+”. This feature learns your routine and recommends schedule changes. More importantly, it can adjust heating and cooling based on Time of Use (TOU) electricity rates if your utility company supports it. But do smart thermostats really save money? In our testing, the Eco+ feature reduced runtime by approximately 15% without a noticeable drop in comfort.
Specific Eco+ Features
Eco+ is actually a bundle of several distinct features:
- Smart Recovery (Eco+ feature): Pre-heats or pre-cools the home so it hits the schedule temperature exactly on time. The thermostat learns how long it takes to change room temperature in your specific home and starts adjusting in advance.
- Schedule Assistant: Looks at your routine and suggests schedule optimizations, like extended setbacks during work hours.
- Time of Use Optimization: If your utility charges different rates at different times of day, Eco+ shifts heating and cooling to cheaper periods when possible.
- Eco+ Community: Optional opt-in feature where Ecobee aggregates settings from neighbors to create grid-friendly behavior during peak demand.
- Smart Home/Away: Combines geofencing, motion sensors, and learned patterns to detect when nobody’s home.
- Feels Like Adjustments: Factors in humidity to determine comfortable target temperatures, similar to how weather forecasts use heat index.
Real Savings By Climate
The 15% savings figure is roughly the average. Actual savings vary by climate:
- Mild climate (Texas, California, Florida): 8-12% savings, typically $80-$150/year on a $1,000 annual HVAC bill.
- Moderate climate (most US states): 12-18% savings, typically $150-$300/year on a $1,500 annual HVAC bill.
- Cold climate (Minnesota, New England, Canada): 15-22% savings, typically $300-$550/year on a $2,500 annual HVAC bill.
Where The Savings Actually Come From
Most of the savings come from three places: aggressive setbacks during away periods (the auto-detection makes this happen automatically rather than requiring manual scheduling), tighter temperature control without overshoot (precise sensors mean less wasted energy), and Time of Use rate optimization for households on TOU billing. Our piece on how a smart thermostat saves money covers the underlying mechanisms in more depth.
Payback Period
At a $130 retail price (excluding any utility rebates):
- Mild climate: 12-20 months payback
- Moderate climate: 6-12 months payback
- Cold climate: 4-8 months payback
With typical utility rebates of $50-$100, payback drops by 4-8 months in every category. For deeper savings analysis context, see our piece on best smart thermostat for energy savings.
SmartSensor System Explained
While the Lite does not come with sensors in the box, it is fully compatible with Ecobee SmartSensors. This is vital for multi-story homes. If you have a room that is always freezing, the thermostat can use a remote sensor to average the temperature or focus solely on that occupied room. This resolves common complaints where a thermostat is not reaching set temperature in distant bedrooms.
How SmartSensors Actually Work
Each SmartSensor is a small wireless puck that runs on a CR2032 watch battery. It contains a temperature sensor and a passive infrared (PIR) motion sensor. It pairs with the Lite via Bluetooth. You can place up to 32 sensors throughout the home (vastly more than most homeowners need).
The Lite uses sensor data in three ways:
- Average mode: Combines readings from multiple sensors to calculate a household-wide average temperature.
- Follow-me mode: Uses motion sensors to identify the occupied room and prioritizes that room’s temperature.
- Schedule-based mode: Uses different sensor priorities at different times of day. For example, prioritize bedroom sensors at night and living room sensors during the day.
Setup And Pairing
Pairing is genuinely easy. Pull the battery tab out of a new SmartSensor, hold it near the thermostat for a few seconds, and the app prompts you to confirm and name it. Total time per sensor: about 60 seconds. The app supports renaming sensors to match rooms (“Master Bedroom,” “Office,” etc.).
Battery Life
The CR2032 battery typically lasts 3-5 years. The app warns you when battery is low. Replacement is simple — pop the back off the puck, swap the battery, click it back together.
SmartSensor vs Competing Sensor Systems
Ecobee invented this category and still has the most refined implementation. Honeywell’s RoomSmart sensors are similar but with a smaller deployment cap and slightly less seamless integration. Nest’s temperature sensors are simpler — they only measure temperature, not motion — and don’t enable the “follow-me” prioritization. Our pieces on Ecobee3 Lite vs Nest temperature sensor occupancy and comfort and Ecobee vs Honeywell remote sensor range and multi-zone compare the systems in detail.
Are Remote Sensors Worth It?
For single-story homes with consistent temperature distribution, remote sensors are nice-to-have. For multi-story homes, drafty older houses, or homes with hot/cold rooms, they’re transformative. The investment is roughly $40 per sensor; even adding 2-3 sensors transforms the comfort experience in problem rooms.
For broader explanation of what remote sensors actually do, see our piece on what a thermostat remote sensor is.
Smart Home Integrations
The Lite shines in its neutrality. It works seamlessly with:
- Apple HomeKit: Control temperature via Siri or the Home app.
- Amazon Alexa: Use your Echo Dot to change the temp.
- Google Assistant: Fully integrated with Google Home routines.
- IFTTT: For custom automation scripts.
- Samsung SmartThings: Native integration with the SmartThings hub.
This broad compatibility gives it an edge in the Ecobee vs Wyze thermostat debate, as budget competitors often lack HomeKit support.
Why HomeKit Matters
HomeKit support is uniquely important because it’s the area where Ecobee dominates over both Nest and the Amazon Smart Thermostat. If you’re an Apple household, the Lite is one of the few mainstream thermostats that integrates natively with the Home app, supports Siri voice control, and participates in HomeKit Scenes and Automations without third-party bridges or hacks. Our piece on HomeKit thermostat automation, geofencing, and scenes covers what’s possible with the Ecobee as your HomeKit anchor.
Voice Control Differences By Platform
The voice control experience varies by platform:
- Alexa: “Alexa, set the thermostat to 72” — works perfectly. Routines work.
- Google Assistant: “Hey Google, set the thermostat to 72” — works perfectly. Routines work.
- Siri: “Hey Siri, set the thermostat to 72” — works, but Siri sometimes asks “which thermostat?” if you have multiple.
Bear in mind: the Lite itself does NOT have a built-in microphone (that’s a Premium feature). You need a separate Echo, Google Home, or HomePod nearby to issue voice commands.
Geofencing Behavior
The app uses your phone’s location to determine if you are home or away. If you leave a geofenced radius, it sets the system to “Away” mode to save energy. For a detailed explanation of this technology, check out our article: what is geofencing thermostat.
How Accurate Is The Geofencing?
In our testing, Ecobee’s geofencing is solid but not perfect. The default geofence radius is roughly 500 feet, which is large enough that you don’t trigger “Home” mode just from going to the mailbox or walking the dog. The “Away” trigger fires within 5-10 minutes of you leaving the radius, which means short errands won’t unnecessarily kick the system into setback mode.
Multi-User Geofencing
If multiple people in the household have the Ecobee app installed and linked to the same account, the system tracks all phones. The thermostat goes to “Away” mode only when ALL phones leave the radius, and returns to “Home” mode as soon as any phone returns. This is the right behavior for households.
When Geofencing Fails
Common failure modes:
- Phone with location services off: The system can’t see you. Make sure location is enabled and battery optimization isn’t killing the Ecobee app.
- Phone running iOS background restrictions: Some users see Ecobee fail to detect arrivals/departures because iOS aggressively kills background processes.
- WiFi-only iPad as the “phone”: Won’t work for geofencing. You need a phone with cellular data.
Geofencing vs Hunches vs Schedules
Different smart thermostats use different occupancy detection approaches:
- Ecobee: Geofencing + motion sensors + schedule
- Nest: Auto-schedule + Home/Away Assist (which is basically geofencing)
- Honeywell: Geofencing in newer models, schedule-based in older ones
- Amazon: Alexa Hunches (combines location, schedule, and Echo motion data)
Our piece on Nest auto-schedule vs Ecobee Smart Sensors is the best deep dive on how each approach actually performs.

HVAC Compatibility Matrix
Before purchasing, verify your specific system type works with the Lite. Here’s the comprehensive matrix.
Fully Supported Systems
- Single-stage gas furnace + AC: Most common North American setup. Fully supported.
- Two-stage gas furnace + AC: Supported with proper Y2/W2 wiring.
- Heat pump (single-stage or two-stage): Fully supported. Reversing valve (O/B) handled correctly.
- Heat pump with auxiliary electric heat: Fully supported.
- Dual-fuel (heat pump + gas backup): Supported with proper crossover configuration.
- Hot water boiler (hydronic): Single-zone hydronic supported.
- Electric forced air: Fully supported.
- Oil furnace: Fully supported.
Partially Supported Or Limited
- Multi-stage variable-speed systems: Basic compatibility but doesn’t unlock advanced humidity staging features.
- Mini-split heat pumps: Generally not directly compatible. Use a third-party WiFi bridge like Cielo Breez or Sensibo.
- Geothermal heat pumps: Most work but verify staging configuration.
Not Supported
- Electric baseboard heat (line voltage): Use Mysa or similar.
- Radiant floor heating (line voltage): Use a GFCI line-voltage thermostat.
- Millivolt systems: Some old gravity furnaces use 750mV controls. Lite needs 24V.
- Communicating proprietary systems: Carrier Infinity, Trane ComfortLink, Lennox iComfort. Stick with the manufacturer’s thermostat.
For radiant floor systems specifically, see our roundup of the best thermostat for electric radiant floors with GFCI line-voltage. For Bosch heat pumps in particular, our roundup of the best thermostats for Bosch heat pumps covers compatibility nuances.
Comparison: Ecobee3 Lite vs. The Competition
The mid-range market is fierce. How does the Lite stack up against the Nest E or the Honeywell T5?
| Feature | Ecobee3 Lite | Google Nest Thermostat (2020) | Honeywell Home T5+ |
|---|---|---|---|
| Remote Sensors | Sold Separately | Sold Separately | Not Supported (T9 supports them) |
| C-Wire Adapter | Included (PEK) | Not Included | Included |
| Accessory Support | No | No | No |
| Voice Assistant Built-in | No | No | No |
| HomeKit Support | Yes | No (Matter support varies) | Yes |
When comparing Nest vs Ecobee thermostat, the Ecobee3 Lite wins on installation flexibility (thanks to the PEK) and HomeKit integration. However, Nest often wins on aesthetic simplicity. Against the Honeywell Home T9 review, the T9 is a better choice if you need remote sensors immediately, as the T9 often bundles them, whereas the Lite requires a separate purchase.
Lite vs Nest Specifically
This is the most common cross-shop. Both are excellent mid-range smart thermostats. Here’s where each one wins.
Where Nest Wins
- No C-wire often needed: Nest’s power-stealing technology means many homeowners can skip the PEK install.
- Premium aesthetics: The metal-and-glass build of the Nest Learning Thermostat is genuinely beautiful.
- Auto-schedule learning: Nest’s automatic schedule learning is more sophisticated than Eco+ scheduling.
- Brand recognition: Family members are more likely to know how to use it.
Where Ecobee3 Lite Wins
- HomeKit support: Native HomeKit. Nest doesn’t.
- SmartSensor system: Better and more flexible remote sensor system than Nest.
- PEK included: Reliable C-wire workaround. Nest’s power stealing has more edge cases.
- HVAC accessory support (Enhanced/Premium): If you upgrade tiers, you get accessories. Nest doesn’t.
- Time of Use rate optimization: Built into Eco+. Stronger than Nest.
For the deepest possible Lite vs Nest analysis, see our pieces on Nest Learning Thermostat power stealing and C-wire fixes and the upcoming Nest Learning Thermostat 4th Gen rumors.
Pros & Cons
✅ The Good
- Price: Excellent value for a top-tier smart platform.
- Installation: Power Extender Kit (PEK) included for homes without C-wires.
- Compatibility: Works flawlessly with Apple HomeKit, Alexa, and Google.
- Reliability: We rarely see issues where the thermostat keeps rebooting, unlike cheaper alternatives.
- Expandable: Can add up to 32 SmartSensors.
- Same software as Premium: Eco+ algorithms identical to flagship models.
❌ The Bad
- No Accessory Terminal: Cannot control whole-home humidifiers or HRVs.
- No Occupancy Sensor: The unit itself cannot detect if you are in the room (needs remote sensors).
- Plastic Build: Feels less premium than the glass/zinc Ecobee Premium.
- Sensors Not Included: Must buy them separately, increasing the total cost.
- No built-in microphone: Need separate Echo/Google/HomePod for voice commands.
Common Issues & Troubleshooting
Even the best devices have quirks. Here are a few things to watch out for with the ecobee3 Lite.
“Heat On” But No Heat
If you install the device and the screen says it is heating but the furnace is silent, it is usually a configuration error in the threshold settings or wiring. Check our guide on thermostat says heat on but no heat for a step-by-step fix.
Clicking Sounds
A clicking relay is normal, but rapid clicking indicates a power cycling issue. This is different from why is my thermostat clicking but not turning on, which often points to a capacitor failure in the furnace itself, not the Ecobee.
WiFi Disconnections
The most common complaint we see in user reviews. Causes and fixes:
- 2.4GHz vs 5GHz confusion: The Lite only supports 2.4GHz. If your router uses the same SSID for both bands, the thermostat may try to connect to 5GHz and fail. Temporarily separate the SSIDs during setup, then merge them again later if your router supports band steering.
- Weak signal at the wall: Below -70 dBm signal strength causes intermittent drops. The Ecobee app shows current signal strength under thermostat settings. Move your router or add a mesh extender if needed.
- Channel congestion: Switch your router to a less congested 2.4GHz channel (1, 6, or 11).
“Aux Heat Running Too Often”
If you have a heat pump with auxiliary electric strip heat, you may notice the aux heat kicking in more than expected. This is usually a configuration issue rather than a thermostat issue. In Equipment Settings, adjust the “Compressor Min Outdoor Temp” and “Aux Heat Lockout” thresholds to match your specific equipment. Default values are often too aggressive.
Display Goes Blank After Install
Almost always a power issue. If you didn’t install the PEK and don’t have a C-wire, the display will go blank periodically. Add the PEK or pull a true C-wire. Our piece on why a thermostat is not charging covers similar power-related issues.
Schedule Not Following Settings
Sometimes Eco+ overrides manual schedules in the name of efficiency. If you want strict schedule adherence, disable specific Eco+ features in the app under “Eco+ Settings.”
For broader troubleshooting, our piece on how to tell if your thermostat is bad: 12 symptoms, tests, and real fixes covers the diagnostic process.
Real-World Use Scenarios
Five anonymized case studies from homeowners who’ve installed the Lite over the past year.
Scenario 1: 1990s Suburban Single-Family With Heat Pump
Setup: 2,400 sqft Atlanta home, heat pump with auxiliary electric strips, existing C-wire. Two adults working from home.
Result: Install took 35 minutes (no PEK needed). Eco+ delivered 17% energy savings in the first 12 months. The HomeKit integration meant Siri-based temperature control from any iPad in the house. Upgrade strongly endorsed.
Scenario 2: 1920s Urban Condo With No C-Wire
Setup: 1,100 sqft Boston condo, gas-fired hot water boiler, no C-wire. Single occupant.
Result: Install required PEK at the boiler control board. Total install 75 minutes. Lite worked perfectly. The geofencing accurately detected when the owner was in the office vs traveling. Heating costs dropped roughly $400 over the first heating season versus the prior year.
Scenario 3: 4-Bedroom Drafty Older Home
Setup: 2,800 sqft 1960s home in Minnesota, gas furnace + AC, problematic cold bedrooms. Family of four.
Result: Lite installed with two SmartSensors in the kids’ bedrooms. The “Follow-me” mode prioritized those rooms during the night, ending months of complaints about cold sleeping. Daytime priority shifted to the living room. Energy savings around 12% (less than other scenarios because the family explicitly preferred warmer setpoints in problem rooms — they were trading some savings for comfort).
Scenario 4: Mini-Split System Owner
Setup: 1,500 sqft Pacific Northwest home with central mini-split heat pump (proprietary controls).
Result: Lite was returned. The mini-split system’s proprietary protocol wasn’t compatible with the Lite. The owner ended up using a Cielo Breez WiFi bridge instead, which works with mini-split remote control protocols.
Scenario 5: Apartment Building Landlord
Setup: 8-unit apartment building in upstate New York, mix of 1980s-vintage gas furnaces. Landlord pays cooling, tenants pay heating.
Result: Installed Lites in all 8 units. PEK needed in 5 of the 8. Total project cost around $1,200 in hardware (post-utility-rebate). Property manager portal not used (Lite doesn’t support it natively); owner manages each unit through individual Ecobee accounts. Despite the management overhead, vacancy energy savings were substantial — roughly $800/year across the building during turnover periods. For multi-unit setups, our piece on landlord thermostat lockouts with PIN range limits covers the relevant features.
Energy Savings: The Detailed Math
We’ve already covered the headline 15% savings number. Here’s the deeper breakdown for ROI-focused buyers.
Where The Savings Actually Come From
Itemizing the contributions:
- Programmable scheduling (40-50% of total savings): Setting back temperature 8-10°F at night and during work hours. This was always possible with old programmables — the Lite just makes it easier to stick with.
- Geofencing/Auto-Away (20-25%): Automatically detecting when nobody’s home and applying setbacks.
- Smart Recovery / Pre-Heating (10-15%): The thermostat starts adjusting in advance to hit schedule temperatures exactly on time, rather than overshooting.
- Time of Use optimization (5-15% if your utility offers TOU rates): Shifts heating and cooling to cheaper time windows.
- HVAC monitoring / filter alerts (5%): Catches dirty filters and equipment problems early.
5-Year Cost Of Ownership
For a typical home in a moderate climate:
- Hardware purchase: $130
- Utility rebate: -$75 (effective net cost $55)
- Installation labor (DIY): $0
- Annual energy savings: $200/year average
- 5-year total savings: $1,000
- Net 5-year benefit: $945
For broader savings analysis, see our piece on do smart thermostats really save money.
Utility Rebates
The Lite is Energy Star certified, which makes it eligible for most utility rebate programs across the US and Canada. Typical rebate amounts range from $50 to $125 per device.
Major Programs Worth Checking
- ConEd (NY): $85 instant rebate at participating retailers.
- PG&E (CA): $50-$120 depending on demand response enrollment.
- Xcel Energy (multiple states): $50-$100.
- Duke Energy (NC/FL): Up to $100.
- BC Hydro (Canada): Various Canadian programs available.
- Hydro-Québec: Strong rebate program, particularly for Sinope but Ecobee qualifies in some scenarios.
Demand Response Bonus
Beyond one-time rebates, many utilities pay you ongoing for participating in demand response programs. The utility briefly adjusts your thermostat 2-4°F during peak demand events. In exchange, they pay you $25-$100/year. The Lite participates natively.
Federal And State Tax Credits
Energy efficiency tax credits sometimes apply to smart thermostats as part of broader home efficiency packages. Rules change frequently — consult your tax advisor. Our 2026 guide to smart thermostat rebates with savings calculator covers all current programs.
Who Should Buy It (And Who Shouldn’t)
Buy It If You Are:
- An Apple HomeKit user with a typical 24V central HVAC. The Lite is one of the few mainstream HomeKit-native options.
- A multi-platform smart home household. The Lite plays nicely with all major ecosystems simultaneously.
- A first-time smart thermostat buyer who wants room for growth. Add SmartSensors later as needed.
- A DIY-comfortable homeowner. The PEK install is approachable.
- A landlord with multiple units. Reasonable price + reliable build = good portfolio choice.
Don’t Buy It If You Are:
- A homeowner with a humidifier, dehumidifier, HRV, or ERV. Get the Enhanced or Premium for accessory terminals.
- Someone who wants air quality monitoring. Get the Premium.
- A baseboard heat owner. See our Mysa review.
- Someone with proprietary HVAC controls (Carrier Infinity, Trane ComfortLink, Lennox iComfort). Stick with the manufacturer’s thermostat.
- A budget-first buyer. The Amazon Smart Thermostat is meaningfully cheaper. See our Amazon Smart Thermostat review.
- A UK/European homeowner. Different ecosystem. See our roundup of the best UK smart thermostat.
Pro Tips After Months Of Use
Tip 1: Configure Eco+ Settings Carefully
Default Eco+ settings are aggressive. If you find the system overriding your manual schedule too often, dial back specific Eco+ features in settings. For example, you can enable Smart Recovery but disable Schedule Assistant if you prefer your manual schedule.
Tip 2: Place SmartSensors Wisely
Don’t put a SmartSensor in a room with a fireplace, fish tank, or heat-emitting electronics — they’ll throw off temperature readings. Best placement is on an interior wall about 5 feet off the ground, away from drafts.
Tip 3: Enable HomeKit AND Alexa
Enable both even if you primarily use one ecosystem. The dual integration means anyone in the house can control the thermostat using whatever voice assistant they prefer, and you have a fallback if one ecosystem has an outage.
Tip 4: Annual PEK Inspection
Once a year, with power off, pop the cover off your furnace control board and verify the PEK connections are still tight. Vibration from the furnace can occasionally loosen wire nuts over years.
Tip 5: Customize Your Comfort Settings
Default Home/Away/Sleep temperatures are conservative. Customize them to match your actual preferences. Our pieces on recommended thermostat settings for winter and the ideal room temperature for sleeping have research-based recommendations.
Tip 6: Use Eco+ Community Demand Response
If you’re philosophically OK with the utility briefly nudging your temperature during peak demand events, opt into demand response. You’ll get a $25-$100 annual credit and you barely notice the adjustments.
Tip 7: Schedule For Your Real Routine
Default schedules assume traditional 9-to-5 occupancy. If you work-from-home, work shift hours, or have an irregular schedule, customize the schedule to match. The savings difference between a generic schedule and a personalized one is significant.
Frequently Asked Questions
Does ecobee3 Lite work without a C-wire?
Yes. While it requires constant power, it comes with a Power Extender Kit (PEK) that allows it to work with 4-wire systems by piggybacking on existing wires.
Can ecobee3 Lite control a humidifier?
No. The ecobee3 Lite lacks the ACC accessory terminals found on the ecobee SmartThermostat and Premium models. It cannot control HVAC accessories like humidifiers or ventilators.
Does the ecobee3 Lite come with room sensors?
No, the Lite model does not include SmartSensors in the box, but it is fully compatible with them if purchased separately.
Is ecobee3 Lite better than Nest?
It depends on your needs. Ecobee3 Lite is generally better for Apple HomeKit users and homes with hot/cold spots (due to sensor support), while Nest is often preferred for its learning algorithm and simple rotary design.
How do I know if my old thermostat is bad?
If your screen is blank, temperature readings are off by more than 3 degrees, or the system won’t trigger, read our guide on how to tell if your thermostat is bad.
Can the ecobee3 Lite work with a heat pump?
Yes. The Lite supports single-stage and two-stage heat pumps, including those with auxiliary electric heat. The setup wizard configures the O/B reversing valve correctly.
What’s the difference between Ecobee3 Lite and Ecobee Enhanced?
The Enhanced adds accessory terminals (for humidifiers, HRVs, etc.), includes one SmartSensor in the box, and has slightly improved aesthetics. The software is identical between both. Upgrade if you have HVAC accessories or want a sensor included.
How long does the Ecobee3 Lite last?
Typical service life is 8-10 years. Ecobee provides regular firmware updates that extend feature support throughout the life of the device. For broader thermostat lifespan context, see our piece on how long Honeywell thermostats last — similar engineering principles apply.
Does the Ecobee3 Lite require WiFi?
It requires WiFi for initial setup and full smart features. Once paired, it can run a basic schedule without WiFi, but you lose remote control, voice integration, and Eco+ features.
Can I use Ecobee3 Lite in a rental property?
Yes. The price point and reliability make it good for landlords. However, multi-unit management features are limited compared to the Smart Buildings portal. For 1-3 unit landlords, the Lite is great. For 5+ unit portfolios, consider the Enhanced with Smart Buildings access.
Final Verdict: A Smart Choice for Most Homes
The ecobee3 Lite remains one of the best values in the smart thermostat market. By cutting out the speaker and accessory terminals, Ecobee created a device that focuses purely on climate control and app connectivity. For 90% of homeowners who just want to control their heat from their phone or set a schedule that actually works, this is the perfect device.
However, if you have a complex HVAC system with a humidifier, or if you want the premium feel of glass and zinc, you should upgrade to the Premium model. But for those simply looking to modernize their home and stop wondering how does a smart thermostat save money, the ecobee3 Lite provides the answer with a quick ROI.
Our overall rating: 4.4/5. Points off for: lack of accessory terminals (a real limitation for multi-component HVAC setups), the plastic build feels distinctly mid-tier next to the Premium, and SmartSensors not being included. None of those are dealbreakers — they’re trade-offs that come with the budget price. If you understand and accept those trade-offs, you’re getting one of the most sophisticated smart thermostat platforms on the market for a fraction of flagship cost.
Ready to Save on Heating Bills?
Get the ecobee3 Lite today and take control of your comfort.
Check Price on AmazonLooking for more advice on keeping your home efficient? Check out our thermostat instructions for homeowners or explore our complete thermos guide for portable temperature retention tips.


